It's nearly time for the Royal Adelaide Show and Matilda is competing with the school show team, exhibiting a wether. (Named Bailey)
 |
| Zara showing her goat, Pistachio, circa 2019, with Tiny Tilly. |
The students have a lot of fun. They stay in Adelaide over night and have some free time to attend the showing the evening. A uniform is required, the school supplies shirts, vests and ties. The students are expected to bring their own dress boots and jeans.The jeans need to be neat, no holes, and preferably dark denim. Their overall score takes into account the neatness of their dress. Last year I made Tilly Calamint jeans , a free pattern from Mood. They were okay but definitely needed more work than I was wiling to give to a pattern to try again.
This year, we decided to try McCall's 5894 which appears to be OOP but still readily available on eBay and Etsy.
Matilda chose view A which is a mid rise with straight leg cut. After measuring her we decided to cut the size 10 as our denim (heavy bull denim given to me and possibly 40 odd years old) had no stretch what so ever. I immediately shortened the leg by two inches at the lengthen/ shorten leg line.
The pattern has many tissue fitting tips before you start cutting but I had time constraints and skipped them. They did look very comprehensive and I would try them, next sew.
I did follow the sewing directions and constructed the jeans up to the fitting point. The front pockets and zipper are completed and the back legs to yoke sewn and pockets attached. Then the crotch seam is left unstitched and the outer and inner legs are pinned together. Next time I will leave the back seam pinned as well and possibly leave off the pockets until I have finished fitting.
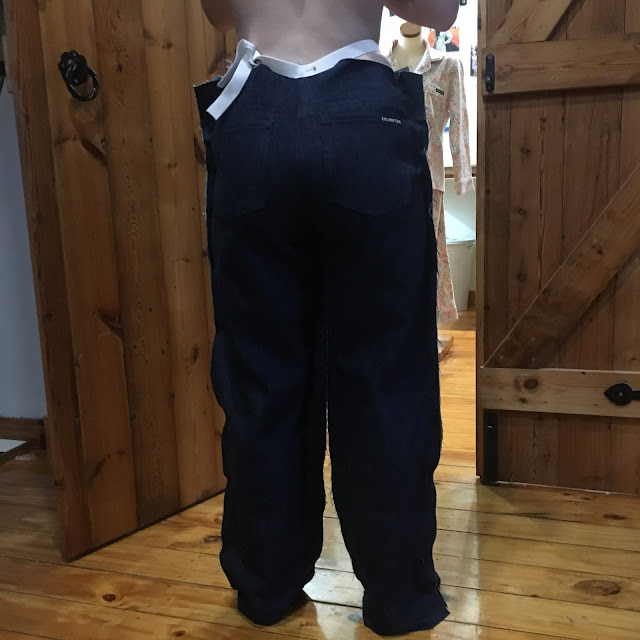
To assist with fitting, you are instructed to tie a piece of elastic where the jeans waistband will sit and tuck the jeans top underneath that.
I found pinning it more efficacious.Matilda found the front and the fit through the thigh just right.
We had to pin a good inch extra from the side seam, at the back yoke.
In retrospect, I should have taken some from the centre back seam too, just the yoke section.Matilda then requested to remove excess fabric, from below the knee, on the inside leg as the were 'swishing' together.
I pinned the adjustments but realised my front zipper was too short to fit the back yoke as much as I would have liked to, so we discussed this and decided to put elastic in the back waist band of the jeans.
This is a technique my older girls frequently get me to alter their RTW jeans with. It allows for a small waist and a bigger derrière and is usually disguised with a belt.
As I assumed these jeans will be handed down to Beatrix and require further adjustment, I constructed the waistband to allow for those future alterations.
The waistband is cut into three pieces, with interfacing only applied to the front sections. The vertical seams are then neatened and sewn back together leaving an opening to thread the elastic through. I put the opening on the inside but you could make a feature out of the elastic and have the opening on the outside. You could sew a self fabric tab on each end of he elastic, make a button hole and add several buttons to the outside waistband and make it adjustable.
Overall, we were both pleased with the fit. Next time, I will use a longer zipper and make a longer fly guard.
I went ahead a drafted a new back yoke pattern piece using the trimmings from fitting. I had to add some height to allow for Matilda's full derrière.
Matilda is very happy with the fit through the thigh and legs.
The back elastic pulls in the waist nicely but is still very comfortable (which she needs, this denim is stiff)!
Tilly had a grand time and did really well.
Thank you for reading xx Nicole


