I finally finished my fabulous Finch shorts and they are indeed fantastic!
Now,to put some furphy's to bed!
They do not have dozens of pieces to sew,the cuffs and waist are in several pieces to give you a very chic finish.
They are not tricky,the instructions are very,very clear and the pieces are well notched.
There you go,don't fret,do buy this pattern!
Just to reassure you,I blogged the construction!
(It's a long one,you may need coffee and chocolates)
As per instructions,transfer your markings.
I carefully poked a hole in my pattern and then used my tailors chalk pencil to make a dot.
 |
| Transferred markings |
Interface the front waistband,I double interfaced mine as I use a soft product and I didn't want the waist band to roll(disregard my piecing,I live a long way from the shops)!
Shorten your stitch length to 2mm. This is a great tip when sewing small fiddly things that will require turning.
Thank you Charlotte!
Following the instructions,sew the side tabs together.
I like to mark the centre with a chalk line so I know when to pivot.
 |
| This can help find the centre when sewing. |
 |
| Pivot on the chalk line. |
Trim the tabs,turn,and gently push out the corners.
Top stitch the edge.
I added a velvet ribbon trim-twice-long story!
Pin the front tabs together leaving a 2 inch opening for turning.
Trim the seams. Turn and press.
Topstitch around the edge securing the opening.
Re-set your Stitch length!
(you guessed it,I forgot)
 |
| The front piece |
I find it helpful to draw my fold lines in.
Fold on one line to match the other and then press in place.
Pin pleats top and bottom.
 |
| The front legs. |
The back legs only have pleats at the bottom.
 |
| The back leg |
Baste the pleats in place just inside the seam allowance.
I pre-neatened the inner leg seam with a narrow zigzag.
Right sides together,stitch a front to a back at the inner leg and press the seam open.
Next time I shall overlock these seams together and the stagger the seam allowance when sewing the crotch seam.
Not sure what I mean? Have a peep here!
It will save some time and I am sure it will sit just fine!
Next sew the two front and back sections together.
I placed my pieces together,clipped the curves and then neatened the seams separately.
 |
| Neatening the clipped edge. |
The neatened edges ready to be sewed.
Pin together.
The sewn seam.
Press the crotch seam open.
Next time I think I will sew the seam and press to one side.
I will let you know how it goes!
Again,consider neatening the side seams before sewing them together.
Sew the seams.
Press them open.
Turn and press!
Pin and sew the side tabs in place as directed.
You may choose to sew your buttons on at this stage.
Following the instructions,sew a front cuff to the back cuff.
This will give you 4 loops,2 main cuffs and 2 lining cuffs.
Press all the seams flat.
Attach the cuffs to the shorts.
I follow a similar method to Charlottes,however I do mine ''backwards'' as I like to top stitch.
So I pin the right side of the cuff lining to the wrong side of the shorts.
Sew in place.
Trim the seams as per instructions.
Press well making sure the seams are down towards the cuffs.
Pin the right side of the main cuff to the right side of the cuff lining and sew.
I like to pre-press the seam allowance up before sewing in place.
Sewn,trimmed and pressed cuff.
Fold the cuff in place and press well along the seam.
One cuff ready to be sewn.
It can be helpful to turn the shorts in side out to sew this.
Top stitched!
Matching the notches,sew the two back waist bands pieces to the front waist band.
Press the seams open.
Sew the back waist band pieces together and you should have 2 loops.
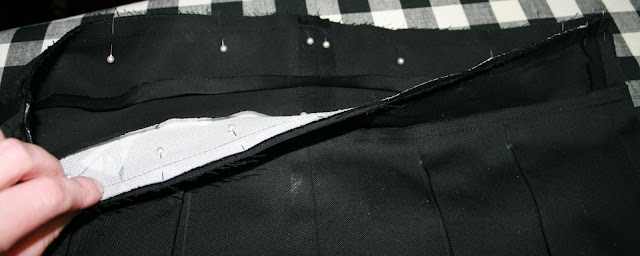
Follow the instructions pin the waistband to the shorts top.
I sew the right side of the waist band lining to the wrong side of the shorts top.
Trim the seam.
Press the seam up to the waist band.
Consider pre-folding the seam allowance before attaching the waistband.
Attach the right side of the main waistband to the right side of the waistband lining.
Press and trim the seams.
Fold and press along the seam.
Topstitch the waistband leaving a 2 inch gap at both side seams to thread elastic through.
 |
| Giving the waistband a jolly good pressing! |
Stitch and press.
Measure the elastic,there is a chart in the pattern instructions.
Thread the elastic through the back of the shorts
Stitch the elastic in place at one edge of the back waistband.
Pull the elastic through and catch with a pin before checking the fit.
Yes Darling,there are pins in it!
Sew the elastic in place and finish the waistband opening.
Pin the waist tab in place and sew on the buttons.
I did re-inforce my front tab-just in case!
We are excited!!!!!!
Fabulous Finch!
Fantastic Finch!!!!
Gorgeous to sew,gorgeous on,very special shorts indeed!
Clever Charlotte,you are on to a winner!
Is anyone still out there?
x N


