 |
| Gathering the top of the skirt |
Gather the top of the skirt between the notches(these were the stars on the pattern). I set my stitch length to 4 and that works well. I don't touch my tension as the pattern suggests.
 |
| Pulling up the threads |
 |
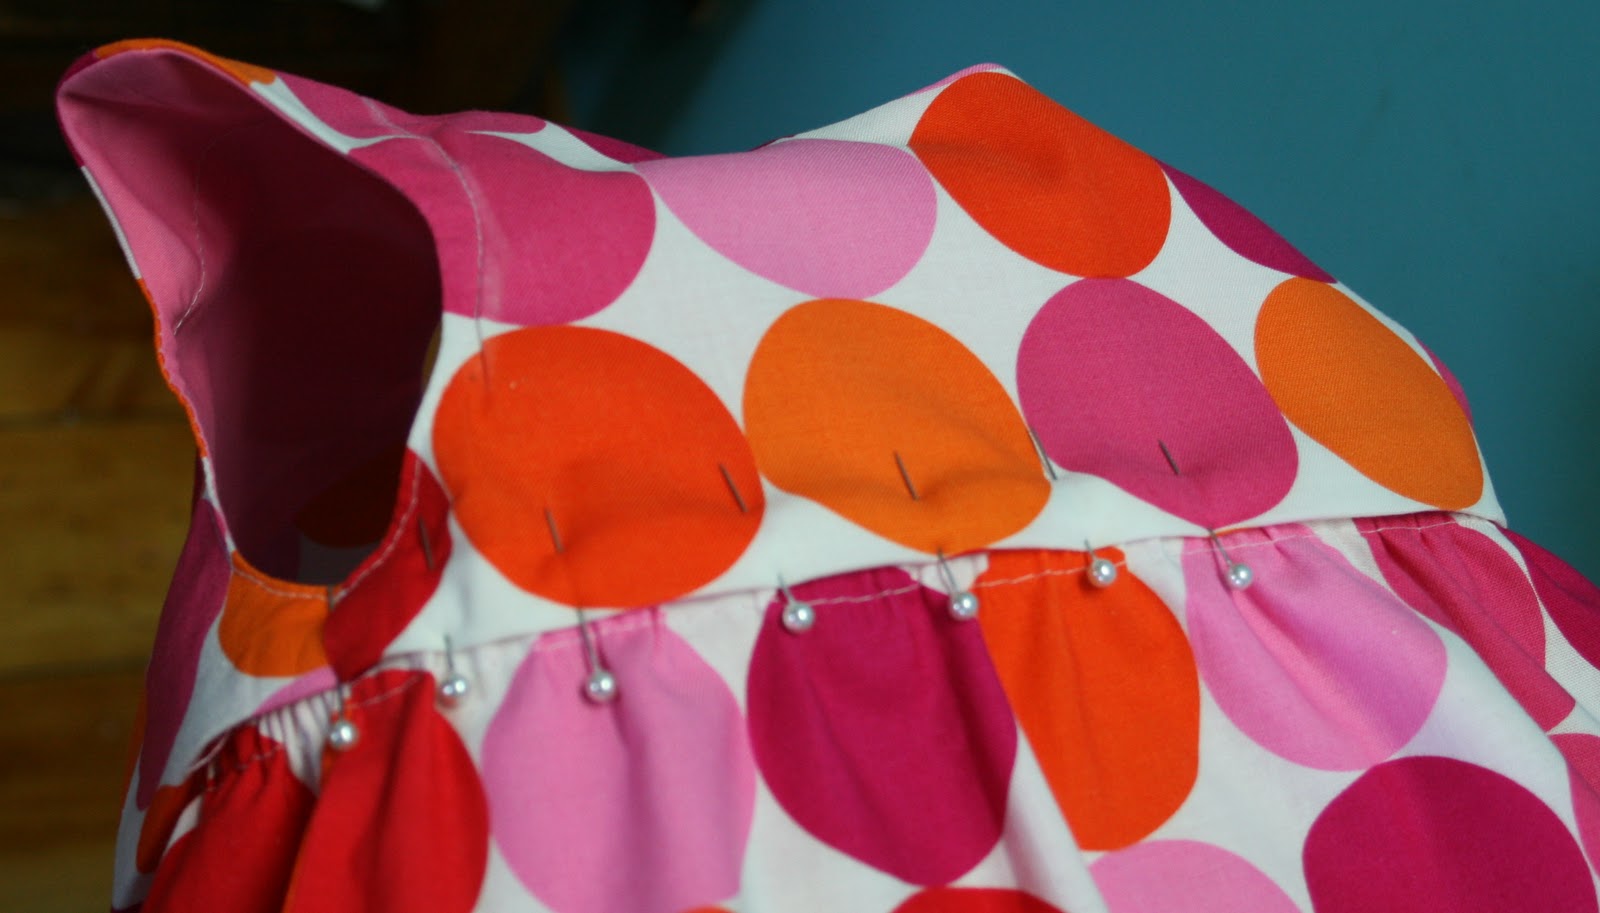
| The gathered edge |
 |
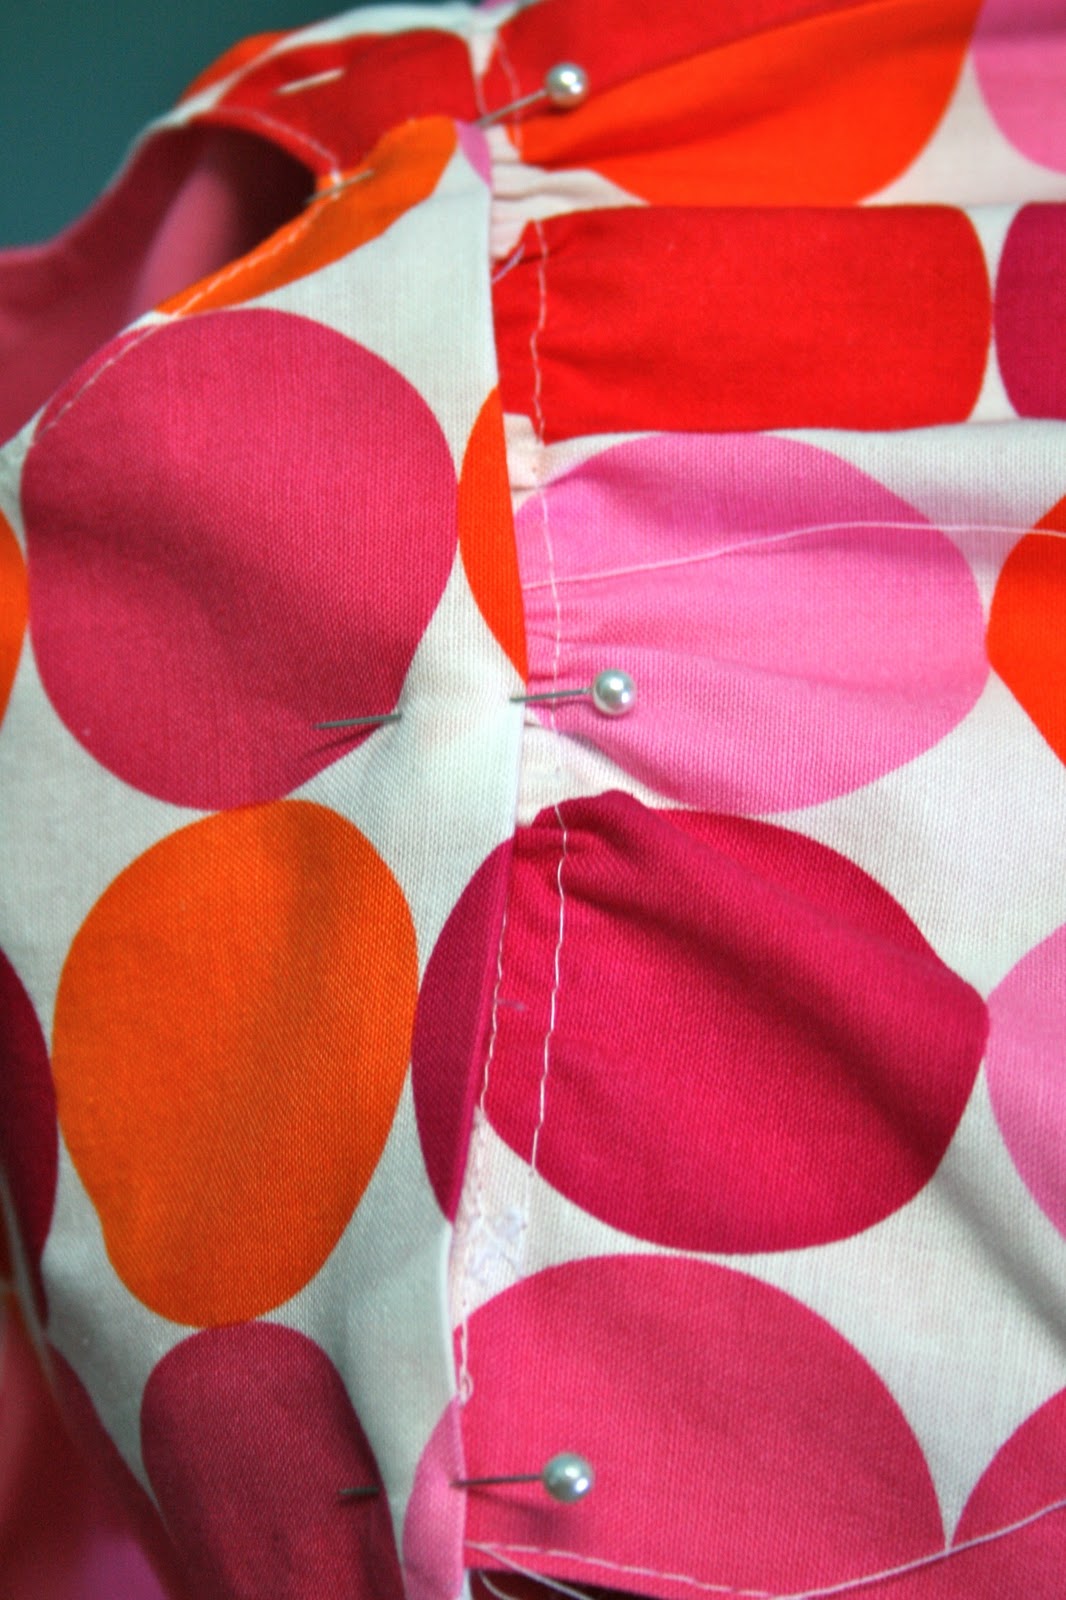
| Attaching the skirt to the bodice |
Pin the RIGHT side of the BODICE LINING to the INSIDE of the skirt, lining to lining.
Pin the bodice away from the edge to prevent catching it when you sew.

 |
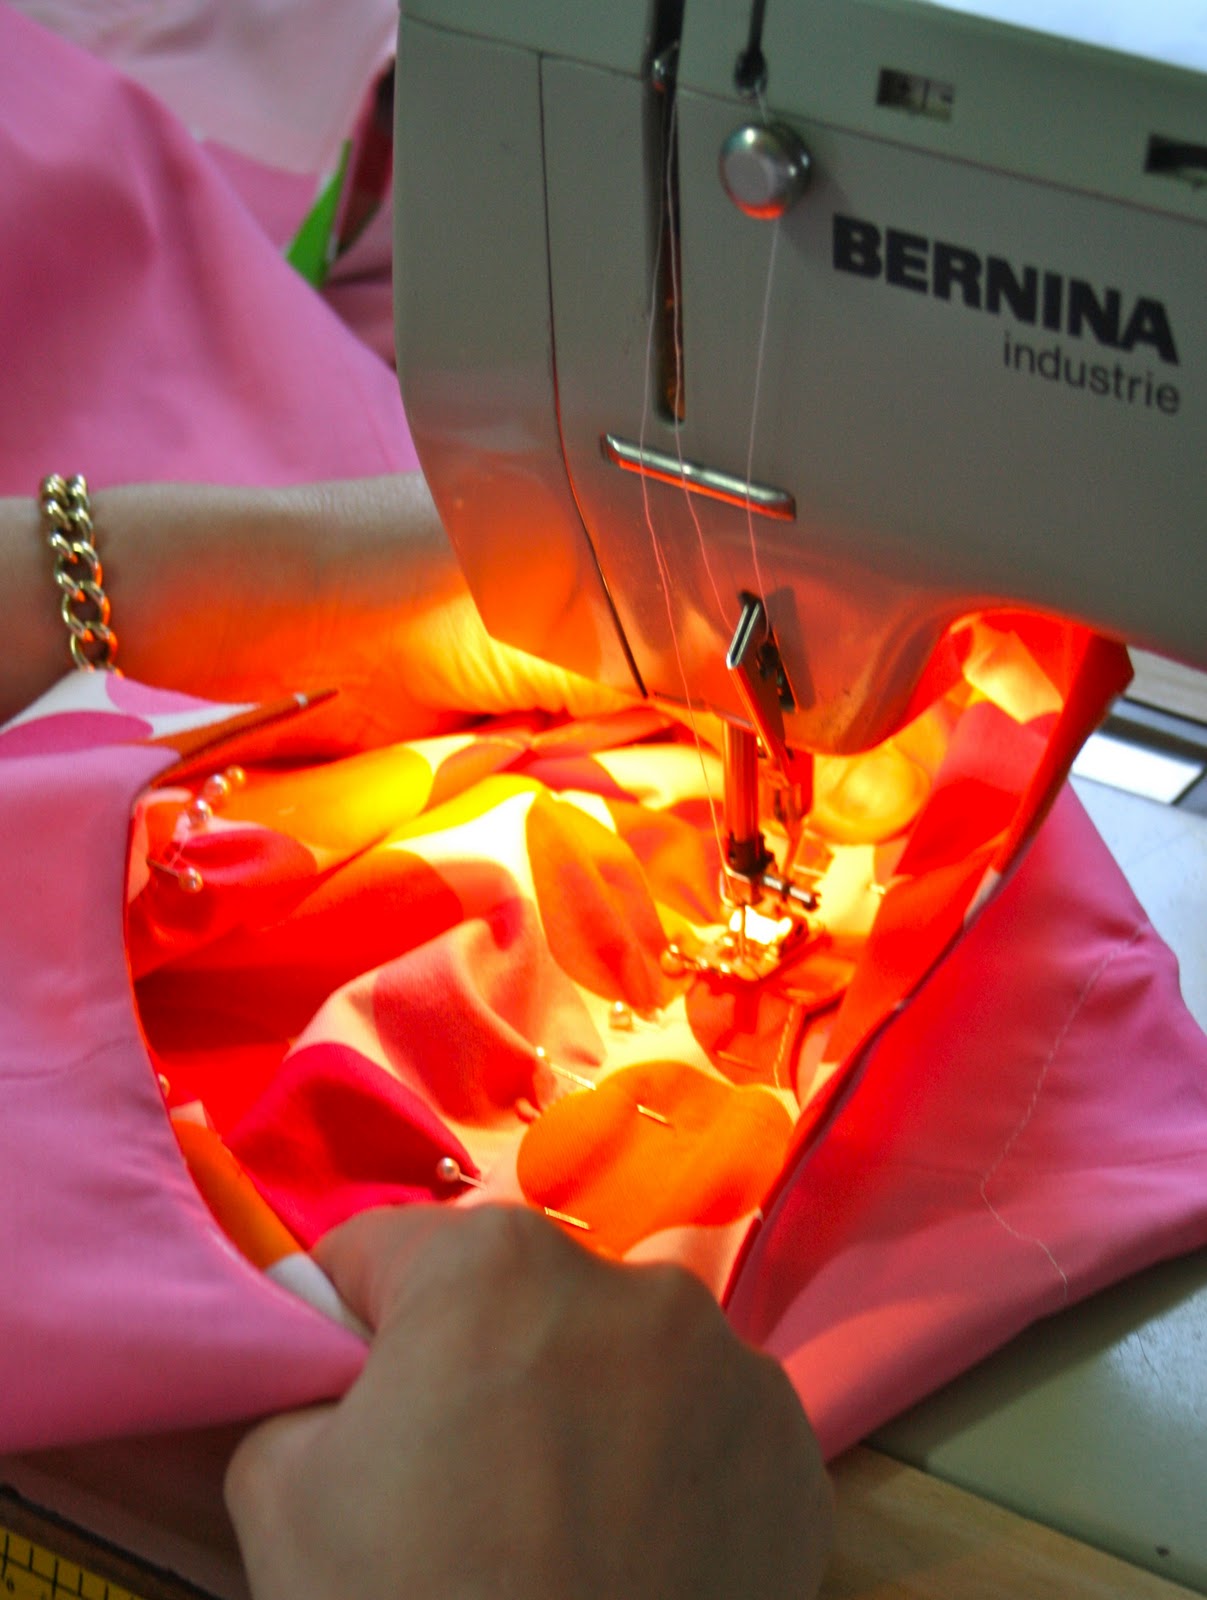
| Turn inside to stitch |
My machine doesn't have a sewing arm, so I turn mine inside to stitch.
|
| Ready to sew |
 |
| Before stitching |
 |
| After stitching |
 |
| Sewing between the gathering threads |
Sew slowly and carefully between the gathering threads watching for tucks and making sure your gathers are even.
 |

Nearly there

 |
| Three little dresses |

Carefully pin the bodice to the top of the skirt covering your previous stitch line. Pin in larger increments first and gradually pin closer, easing as you go.

Check your seam for tucks.
Add as many pins as you need-take your time with this step!
 |
| Adding trim |
 |
| Topstitching the bodice. |
Taking your time stitching closely to the edge, topstitch the bodice to the skirt.
 |
| Ta-dah |
Carefully remove the gathering stitch, a pin works well to slip through the stitch. Don't tug or you may leave holes in your fabric.
 |
| The finished seam |


 |
| Buttons |
Choose your buttons and decide on placement.

I use sticky tape as a button hole guide cutting it a little longer then my buttons.

Cut your button holes, placing a pin long ways to prevent cutting through accidently, make a small slash with a quick-un-pick.

Then snip the button holes with small sharp scissors.

Mark your button placement.

I sticky tape my buttons in position.

Then I sew them on with the machine using the bar tack stitch of my button hole stitch.

I pull the threads to the back with a pin.

And tie a double knot.

When I am sure it is secure, snip the threads.
So much quicker than sewing them on by hand!
 |
| Ta-dah |
There you go, bubbles galore!

To be continued......(just kidding, thats all folks)
 |
| Tula Pink's Bunny Damask |
 |
| Michael Millers Disco Dots |
I never knew you could sew on buttons by machine... I will have to read my manual!
ReplyDeleteWonderful! I will try your method of attaching the skirt next time I make one. I have sewn on buttons with the machine, but I don't do it regularly. I kind of forget to! I don't mind the hand sewing, I do that in bed!
ReplyDeleteThanks for the great tutorial. Like I said, if you felt inclined to do more, I would be very interested.
PS..what is your machine? do you like it?
Wonderful tutorial. Thanks!
ReplyDeleteAbout the placket; it appears that skirt portion doesn't come flush to the edge of the back bodice pieces. Looking at your photo (three little dresses) it appears there is a 1/4 or 1/2" gap from skirt placket to edge of back bodice. Correct?
I'm so used to a different method of making plackets I'm having trouble "seeing" it in the instructions. Thanks to your tutorial, I just might get it now. (A case of teaching an old dog new tricks.)
Cheers!
Do Claire, it saves sooo much time and they are very sturdy!
ReplyDeleteThankyou Millie, I hope it works for you. I quite like hand sewing too, but this is quicker when I have a lot of sewing on (which seems to be always)!
My machine is fantastic! Its a semi-industrial built into a table with a large motor underneath. However, it also has the functions of a domestic machine. It is possibly 30+ years old,I bought it second hand,but if it ever plays up, Husband just takes it to the tractor shed,blows it out with the air compressor, oils it and it goes again. Its a Bernina.
Thankyou Deb.
ReplyDeleteI must stress that this is my method, possibly not the correct way, but how I made it work.
The placket does sit nicely when completed, it ''interlocks'' for want of a better word.
Thankyou for taking the time to read my blog.
This made me and my husband laugh! This is exactly the type of thing my husband would do...... "takes it to the tractor shed,blows it out with the air compressor"!
ReplyDeleteSticky tape, of course! Ah, the thought of never again having to fight my buttons to stay in place, such a relief!
ReplyDeleteYou have done a wonderful job! You matched the prints up on the plackets so well!
What a great idea using sticky tape - thanks for that one.
ReplyDeleteFarmers can fix most things Millie, or break it in the process! (and then point out that it must have been dodgey to snap so easily)
ReplyDeleteI love my sticky tape!
Just be careful on cord as it will 'wax' it if you stick it too firmly.
Thankyou Mel.
My pleasure Jen!
x N
Can you explain how/why you use the tape for making the button holes? I don't have this pattern (gasp!) so I'm not sure how the instructions say to attach the bodice to the skirt. Is the lining kept separate instead of sewing it in at that step?
ReplyDeleteI'll definitely be using double stick tape to hold by buttons in place in future - great tip Nicole. You are a wonderful resource!
ReplyDeleteI use the sticky tape as a stitching guide. You work your button hole to the length of the tape.
ReplyDeleteIt also makes a sound as the needle punctures it, so that helps as well, no ''phft'' ,you have come to the end!
I don't use double sided tape, just bog standard cheap stuff!
Thanks Sandi.
Do you mean the skirt lining or the bodice lining? I guess if you were making this it would make a lot more sense to you.
ReplyDeleteI was just wondering about someone's comment that she liked the way you attached the bodice. Was wondering if it is different than the pattern instructions.
ReplyDeleteOh - the tape is OVER the buttons!! When I saw the picture before I thought it was only under... I probably need more sleep in my life.
Yes it is different, I think mine is backwards to the instructions. I always put my waistbands ,collars etc on backwards to make top stitching easier.
ReplyDeleteI just have very clean sticky tape!(he he)
These are so adorable! I'm bookmarking this page for the next time I make this dress, because I had some trouble attaching the skirt. So, you attached the skirt to the bodice lining, not the bodice itself, right? Maybe that's where I went wrong.
ReplyDeleteI love that you make a bunch at once. I'd like to do this, but in increasing sizes!
Thank you Mylinh!
ReplyDeletePlease note I have deviated a little from the pattern instructions,either way will work,I just prefer top stitching!
Welcome to the wonderful world of oliver+s!
xn
Hello, I've seen your beautiful clothes in the O+S flickr group. Great tutorial - I came across it while sewing the dress and it was helpful to see the photos and comments. I also took your advice and made the elastic 2" shorter which worked very well. Thanks so much :)
ReplyDeleteMy absolute pleasure,I am so pleased to have been of help to you. I will keep an eye out for your dress!
ReplyDeletexx N
THank you so much for this! It saved me when I was constructing my first Bubble Dress. Such fun to sew, I have to make more before my girls outgrow the pattern!
ReplyDeleteI am so pleased Masha!
ReplyDeleteI adore this pattern, it looks so cute on.
Must check out the o+s group for your dress!
xx N
I have a question about attaching the bodice to the skirt. In your tutorial you remove the bottom line of gathering, which I did with my first bubble dress. This time I am using taffeta and don't want the holes to be there. What confuses me is how in the pattern, it says to sew a 1/2" seam, but then that won't cover up the gathering lines, which are further down than 1/2". Also, the pattern never mentions removing the gathering stitches. Your way is great, I am just wondering how on earth it is supposed to work the way it is written. Does that make sense? Thanks so much.
ReplyDeleteHi Marlo, thank you for your compliments.
ReplyDeleteA taffeta version sounds lovely! If you are using a silk taffeta the pin holes 'should' press out. However if its is a acetate fabric and you are concerned about holes I would definitely gather in the seam allowance. You may even want to neaten the raw edge of the taffeta first, a narrow zigzag would do, to make sure the fabric does not fray as you gather.
I hope that helps, please drop me a note if I can be of any more assistance to you.
Good luck,
xx N