Isn't this pretty?
Its the new pattern by oliver+. The Pinwheel tunic and dress.
It is a very snappy very clever ensemble to make.
This tutorial is for the slip dress only as Jed was using the camera when I sewed the tunic.
Anyone want to see 50 photos of sheep? No? Didn't think so....
However,the construction of the flounce is the same and if you ask me nicely I am sure I could be persuaded to make another tunic(he he).
Righty ho,off we go
There are two methods outlined in the instructions,both excellent.
But I read this tip....(from SewMamaSew I think)
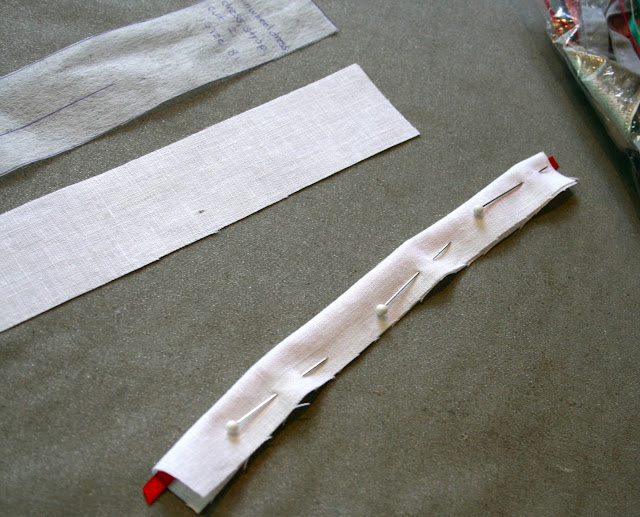
Use a scrap piece of ribbon,longer then the strap piece.
Fold and pin catching the top of the ribbon with a pin.
Sew across the top of the strap with a scant seam and then the side with 1/4 ' seam allowance. Trim back to 1/8 '.
Pulling the ribbon gently sliding it through the casing.
Some fabrics slide easily this linen was a bit grippy and took a little jiggling.
Snip off the ribbon and press well.
If you are concerned about fraying sew a few stitches across the raw ends.
Transfer the markings to the pattern pieces.
Sew the facing front and back together at the side seams.
Neaten and press the seams and then neaten the bottom edge of the facing.
My machine does a row of straight stitch and a separate overlocking stitch in one action. I tend to press seams in opposite directions,so the facing I will press to the bag and the dress to the front so the seams are staggered.
Pin the straps to the right side of the back facing between the transferred dots.
Stitch it in place.
Next,wrap the strap underneath the facing and pin it to the right side of the facing front.
It will look like this when you have finished.
Transfer the markings to the dress pieces.
Apply a square of interfacing as directed and stay stitch either side of the marked centre dot.
Sew the side edges of the front and back dress pieces.
Press and neaten the seam.
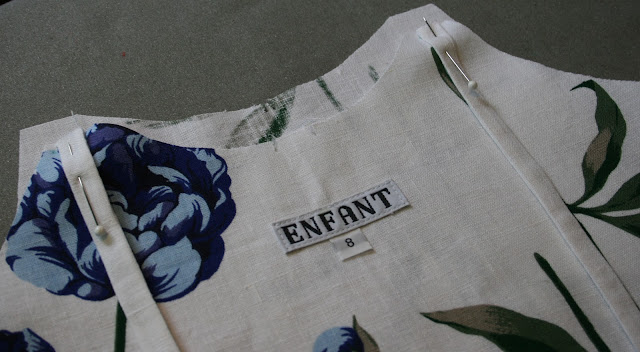
Pin the facing to the dress,right sides together,sandwiching the straps and matching dots and notches.
I found this easiest by pinning the side seam then notches and then filling in the gaps.
As the straps sit under the facing it sort of 'scrunches' up a bit.
Don't worry,just smooth as you sew.
It is definitely easier to sew on the inside.
Press the seams well and then reinforce the straps with a second row of stitches.
Carefully trim the seams.
I like to use pinking shears.
Press the seam allowances towards the facing.
Stitch the seam allowance to the facing as far as you can.
I stopped and started either side of the arm straps.
Trim the threads and press the facing back inside the dress.
Match the side seams and pin the facing in place.
From the right side sew along the side seam.
I think this is sometimes referred to as 'stitch in the ditch'
Press the dress well and on with the flounce.
Construct the flounce with french seams.
Join the wrong sides of the flounce back and flounce front together.
Sew a 1/4' seam and then trim it back to 1/8 th.
Press the seam to one side.
Fold the fabric right sides together and sew another 1/4' seam.
Press the seam towards the back flounce.
Repeat with the other side.
Prepare the binding for the flounce.
I made my own with some black linen I pre-soaked in salt water to set the colour.
I apply mine a little differently then the pattern explains. I used that method for the tunic but I prefer my way.
You may choose which you use.
I fold the binding in half and press well. Then I fold one edge into the middle and press again.
I pin one edge of the binding(the flat unfolded edge) to the wrong side of the flounce.
I don't pin the binding I just slowly stitch it in place.
You may need to trim a bee's whisker from the edge of the flounce&binding edge.
Press the seam towards the binding.
Pin the binding in place.
I tend to pin in sections being careful not to stretch it.
Carefully topstitch in place.
I did a lot of thread swopping with this dress.
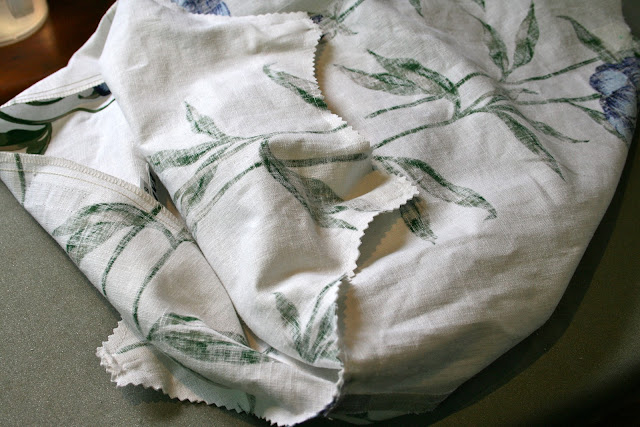
Matching the notches pin one flounce over the other.
Baste the flounce in place.
On the dress,clip up to the basting line
But not through it!
Match the side seams and centre front and back seams and pin them.
Then pin in smaller increments.
Take care smoothing both sides of the fabric when pinning the centre front.
The snip will allow the centre front to open up nicely.
I like to baste this bit first from the dress body side.
Carry on and sew the flounce to the dress,neaten the edge and press the seam towards the dress.
Dampen the right side of the dress.
Smooth and carefully press in place.
I chose to topstitch to help keep the seam in place.
What a lovely look with the tunic.
Actually,its just lovely!
As always,I had a little fiddle with the instructions but it is a lovely pattern to sew.
I can't wait to show you some photos of Liddy wearing it.
xx N


Gosh your sewing is beautiful! I just love your tutorial posts, thanks so much for taking the time!! Abby really wants the slip dress but it will have to wait until summer break since she can't wear it to school (and I have waaay too much other sewing to do first!;))
ReplyDeleteThank you Brittany,you are so kind!
ReplyDeleteE&Z are very keen on the slip dresses too but as we are heading into winter its not that practical now.
Shame,as it is a very enjoyable sew.
xx N
Nicole, *sigh* I LOVE your version of the Pinwheel! I'm sure I'll be referencing your post when I get around to sewing the pattern up.
ReplyDeleteCindy
Thank you Cindy,you are so sweet!
ReplyDeleteThe only problem with oliver+s is that all the cute patterns come out in the wrong seasons for us!
Never mind,I am looking at Book Report and Field Trip now.
xx N
I love your descriptive language, bee's whisker. I like your method for bias tape without pinning the first side. I forgot about soaking colored binding in salt water.
ReplyDeleteHe he thank you Jennifer,I hope it makes sense?
ReplyDeleteI used to pin,I love pinning,I am a pinning freak but I truly found it easier to slowly sew it in place.
Fingers crossed the soaking works!
xx N
Your v's are so perfect!! I just finished a dress (to go with the tunic I finished a few weeks ago) and my v's are not even close to as nice as yours. I need to sew these and only these until I get the hang of it!
ReplyDeleteJust practice and lots of pressing Rebecca!
ReplyDeleteThank you, I am off to see yours!
xx N
Hi Nicole, I noticed an awl in the photo about transferring markings- is that what you used? Such neat sewing and pressing, by the way. My needlework teacher when I was 13 always said, "Your iron is your second needle," and she was right. I iron fervently as I go along!
ReplyDeleteIs that what it is Linda? It is just handy for marking holes.
ReplyDeleteThank you for your lovely compliments.
xxN
Nicole, I am so happy I found Oliver +S and you indirectly. I followed your tutorial on the play date dress to immense happiness of my twins. I can't wait to try this pattern now because of you and I can't express how it and all your others have helped me so much and are so knowledgeable and helpful. My sincere thanks.
ReplyDeleteThank you so much Florence, you have absolutely made my day.
ReplyDeleteO+S patterns are very, very good and there is a great community atmosphere around it.
xx N
PS Please feel free to contact me if you need any help, it would be my pleasure.