Check out this one.
 |
| Hide and Seek Tunic A new pattern by Oliver+S |
This, indeed, is a lovely spring pattern.
But I could see an Autumn tunic.
So, I made one for Liddy.
And I thought I would share.
As directed, apply interfacing to the back yoke pieces.
I applied it to the front and the lining but I use a soft interfacing.
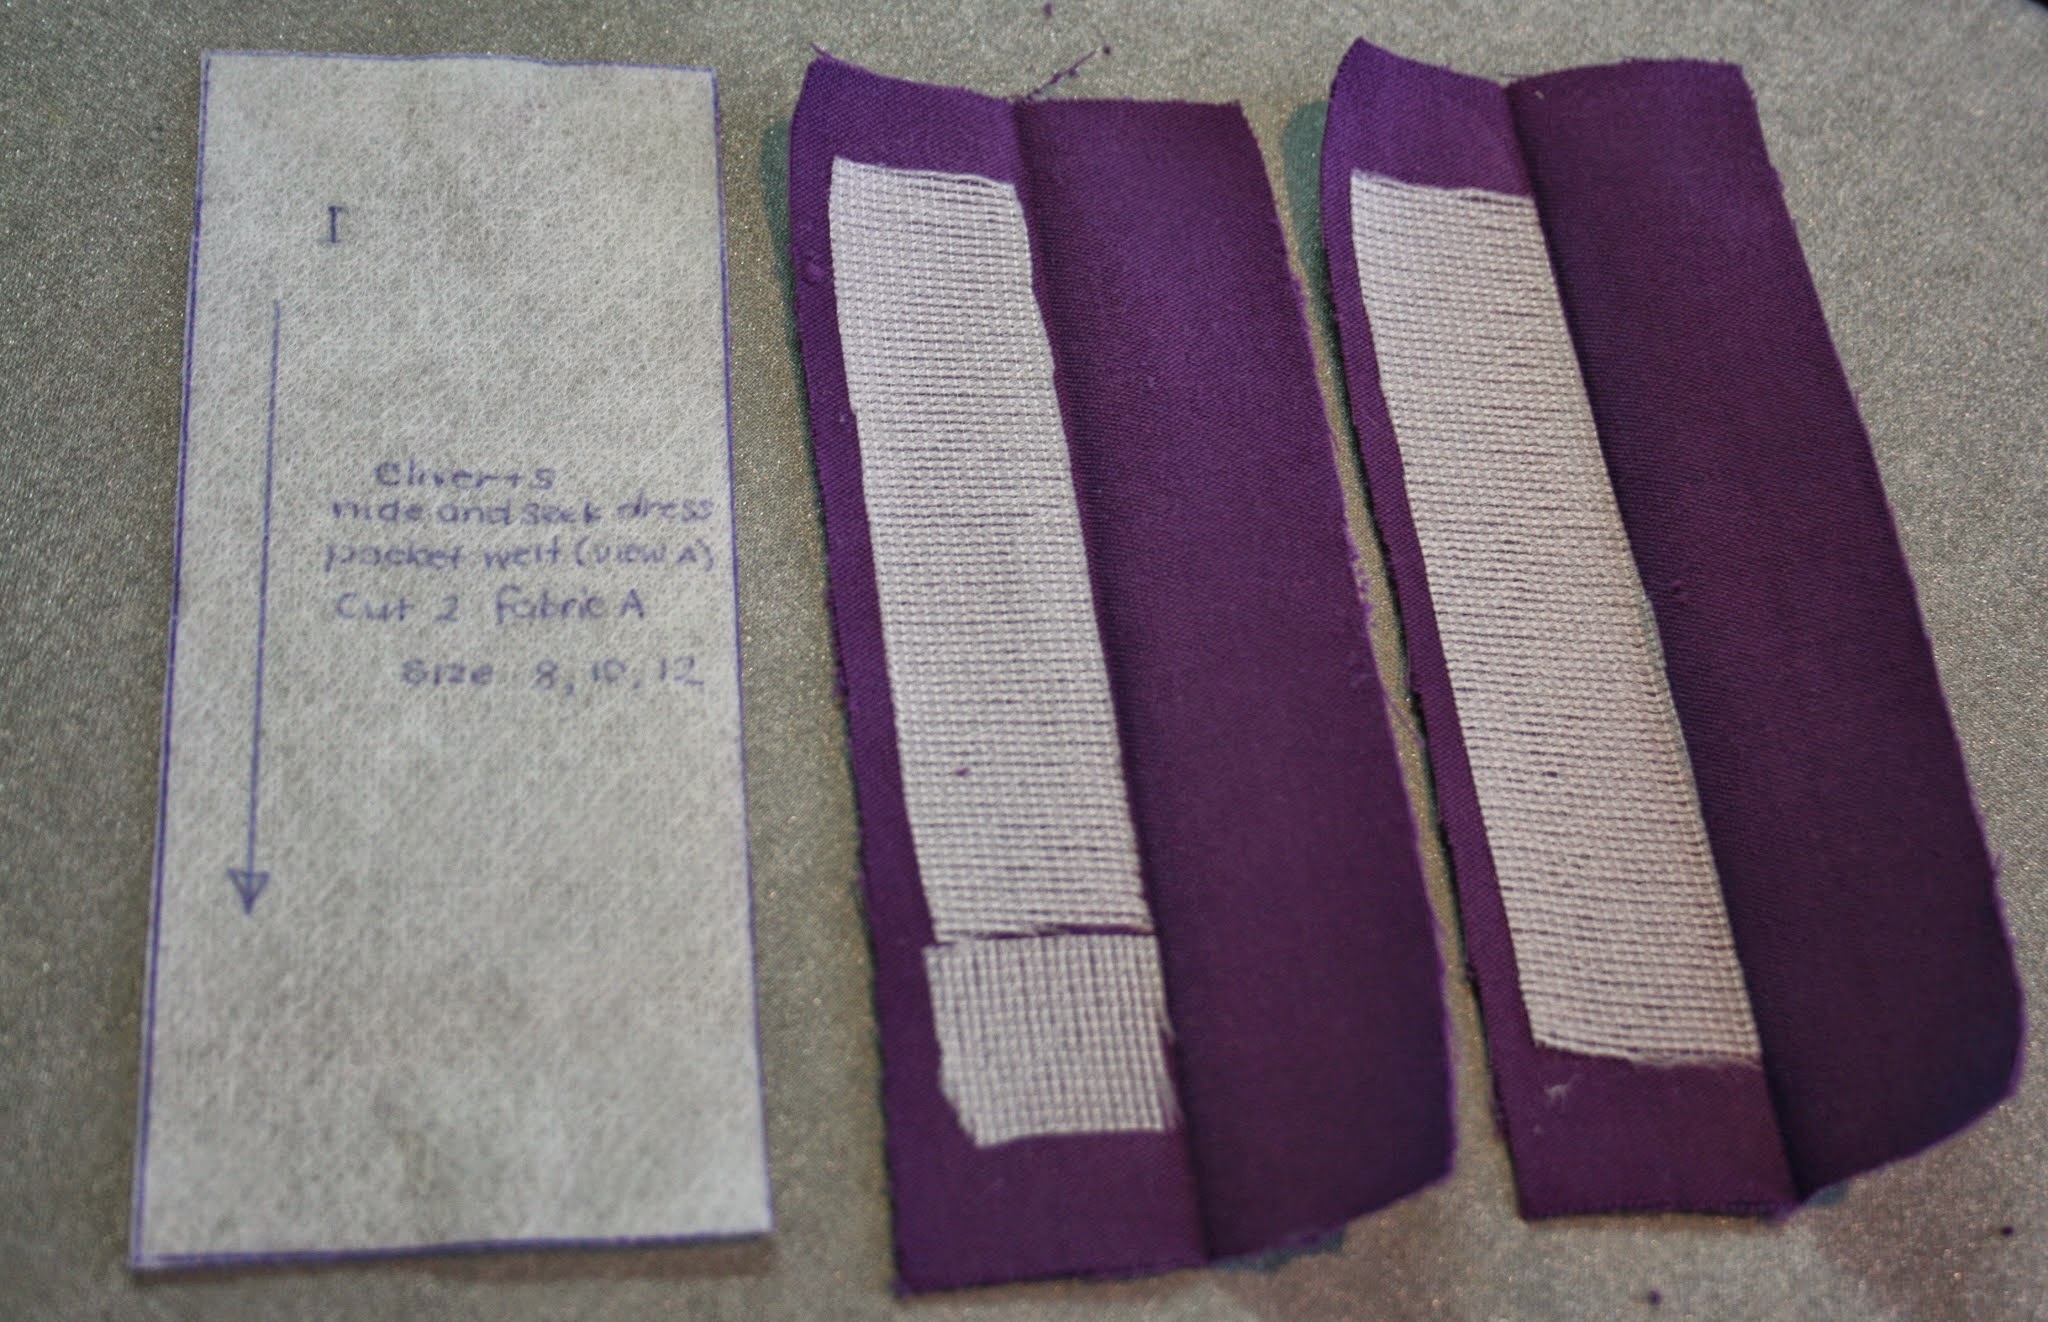
Fold and press the pocket welts in half and apply interfacing to one side.
As directed apply interfacing to the dress front and side.
Please note, I applied my second square too low. It should be at the higher notch. These are to re-enforce the pocket bag.
I removed them and fixed them later.
Sorry Chaps!
Transfer the stitching line for the 'V'.
Fold the pocket welt right sides together. Stitch the two short ends. Press, trim the seams and clip the corners.
Turn the welts to the right side. Use a point turner to get a nice corner.
Velvet can be tricky to press, my Goddess cloth was so helpful.
No iron marks!
As I was using a fine voile to face the heavier velvet I used some scraps of interfacing to stabilise the shoulder seams.
Sew the shoulders matching the notches.
Press the seams, trim and then press open.
Press again from the right side.
Pin the yokes, right sides together up the centre backs and around the neckline.
Don't forget the 'V'.
I like to pop a wee square of interfacing at the base of my 'V'.
Reverse your stitching at the shoulder seams.
You wil trim this seam and this will strengthen it.
When you sew the 'V' shorten the stitch length, it will make the seam stronger.
Trim the seams, clipping the corners.
Trim as far as you can into the 'V' with out snipping through the stitching.
Turn the yoke through to the right side.
Finger press all the edges. Roll them under your fingers so the yoke front shows slightly on the inside.
Just a bee's whisker.
Press well.
And again from the right side.
Once the yoke has cooled, gently pull it open and stay stitch the yoke lining to the seam allowance at the neck.
Stitch as far as you can.
Press well.
Stay stitch around the raw edges of the yoke.
Matching notches, pin the back yoke together. One over lapping the over.
Stay stitch together.
Gather the top of the two skirt pieces with two rows of gathering thread.
Gather up one of the skirt pieces to fit the bottom of the front yoke.
Knot the ends of the gathering thread so that you can ease your gathers right to the end.
If you wish to add trim, do it now. Don't forget to allow for seam allowances.
Matching notches, pin the gathered skirt to the front yoke bottom.
Sew, press, neaten and press again.
Press the seam towards the yoke and top stitch if you wish!
Remove any visible stitching.
Rinse and repeat to complete the back skirt.
That will do for today!
xx N


The dress is so lovely and Liddy looks great in it!
ReplyDeleteThank you Masha. I am not a big purple fan but Liddy loves it and has asked for her winter wardrobe to be based on it.
DeleteI really enjoyed sewing this.
xx N
Oo, very interesting to see how this is cut. Clever of you to use the velvet where it matters and something lighter along the sides. I'm liking this pattern more and more.
ReplyDeleteIts a very nice pattern to sew Christine.
DeleteThe velvet was a $2 remnant I had earmarked for a 2+2 skirt, there was just enough to cut the front skirt length.
I was worried it was too purple but by reversing the nap it looked a lot darker and I *think* we get away with it.
I love it on her.
Thank you
xx N
Thanks for such a great tutorial. I'm bookmarking this one for later. Since I'm overwhelmed by patterns in the smaller O+S size ranges I'm trying to wait until my daughter fits a size 5 before buying any new patterns. But it's hard to wait!
ReplyDeleteThat is very sensible Elizabeth, as Tildy refuses to grow I still need both sizes (well, that is my story and I am sticking to it)!
DeleteThank you, if my tutes are ever any help at all, I am absolutely thrilled!
xx N
I can vouch for how beautifully this one turned out, having seen it in person! So gorgeous, and so lovely to meet you and all your gorgeous family Nicole. I felt like I knew you all already from your lovely photos. You are all welcome at The Drapery any time :) xx
ReplyDeleteAwww Jane, you and Fiona were just so kind. I can't wait to come back!
DeleteI had better get sewing so I can buy some of that lovely wool knit.
Thank you!
xx N
I love reading your tutes, they are so informative. It is good to see how the dress comes together as well. The style will suit my eldest to a T so I will be making her one in the future. No doubt I will be back here when I do!
ReplyDeleteThank you Katy, sometimes it can be good to sew something sewn, I know it stops me 'jumping ahead' and making stuff ups (not always unfortunately)
ReplyDeleteI am sure you will love this dress, we do!
xx N