Lets sew up this puppy!
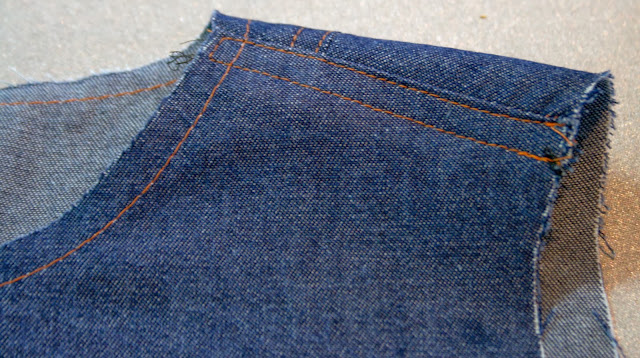
Stay stitch the neck line of the front and back blouse pieces. Use a big stitch and sew this line at 3/8ths.
Start at the shoulder seam and sew towards the middle. Flip and do the other side neck edge the same.
Please don't skip this step, it helps keep the bias of the neck stable when you attach the neck binding.
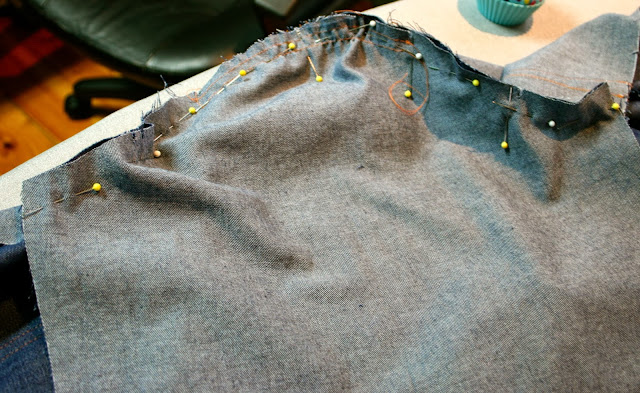
Whilst your machine is set to a big stitch, gather between the notches on the centre lower back panel and sew the easing stitches on the shoulders, again, between the notches.
Press the sleeve hem in place now.
Transfer the dart markings. I find the simplest way is to mark the apex of the dart and draw the line in place to the notched dart opening. I then lay my pattern back over the top to check it is accurate.
Fold the fabric right side together and pin the dart making sure the pin goes through the chalk line on both sides.
Sew the darts. Don't reverse at the apex of the dart, pull the threads through and knot them. This will prevent a 'bubble' at the end of the dart.
I then top stitched my dart a la Puppet Show.
Gather the lower back panel between the notches to fit the back panel.
Knot the end of the gathering threads and then you can safely ease the threads.
Pin in place and sew.
Sew and neaten the raw edge and press the seam towards the upper back piece.
Press well, topstitch and remove the visible basting threads.
Matching notches, pin the side back panels to the centre back piece.
You may have to stretch this to fit, match the notches and you will be fine!
Sew, press, neaten.
Then press the seam towards the centre back panel and topstitch.
Matching notches, sew the shoulder seams.
I find a scrap of iron of interfacing is great here to help stabilise the seam.
Sew, press, neaten.
Press the seam towards the front piece and top stitch.
Press the neck band in half lengthways and the press the edges into the middle to make a long bias strip.
Let this cool.
Matching notches, sew the ends together and press open.
Re-fold and press the bias neck band.
Matching notches, pin the right side of the neck band to the wrong side of the blouse.
Pin the centre front, back and shoulder seams first and then ease the neck band in place.
You may have to stretch the band and/or the neck to get it to fit, that is okay, its bias for a reason.
Sew in place with a 3/8ths seam allowance.
Trim the seam a bees' whisker taking care not to snip the bias.
Fold and pin the centre back in place.
And the the centre front and shoulder seams.
Fold, press and pin the rest of the neck band in place.
Top stitch in place and then give the neck a good press with steamy iron.
Let it cool.
Matching notches pin the sleeve in place, use the gathering stitches to ease it.
Sew, press and neaten the seam.
Press the seam towards the sleeve and topstitch.
Press again with a good steamy iron to give it a good shape.
Let it cool.
Pin and sew the side seams.
Press and then clip into the underarm seams to reduce bulk.
Neaten the seam.
Finish the top by hemming it.
And you are done Baby-baby!
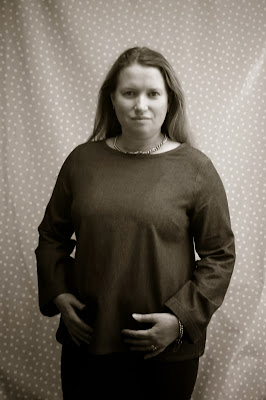
How does it fit?
Very well thank you very much.
No pulling at my shoulders.
But it still has delicate shaping.
So comfy but I still feel very snappy.
Room to breath.
But not sloppy.
I think I have a new favourite top.
xx N


Looks great, Nicole! I was this close to pulling the pattern out and making one for myself yesterday but ended up back in bed sick. Next week, maybe!
ReplyDeleteOh Cindy, I am so sorry you have been ill.
DeleteI had a virus over Christmas and it was awful. We don't even have photos from the day!
You are far trimmer then I and won't need the side adjustments I had to make but the sleeve cap is nice with some of the ease removed.
Feel better soon.
xx N
I agree, it looks great! Thanks for showing us construction details; it is always helpful to see someone's process :D Great top!
ReplyDeleteThank you, I was really apprehensive about having photos taken but I figured I can't bang on about the fit and not show you!
Deletexx N
The fit is wonderful Nicole, you look so fabulous in this! Thank you or taking time to make these two posts! I can't wait to try this out for me.
ReplyDeleteMy absolute pleasure Sharon.
ReplyDeleteWhy should we miss out on nice things because our bodies are not standard?
I hope you do make it for yourself.
xx N
Looks fab Nicole, you are the master of the tutorial.
ReplyDeleteSo if I do everything you did but backwards will I get the big shoulders, little boobs fit?!
ReplyDeleteWell done and your topstitching is soooo precise. You should be a surgeon!
Sounds good to me Shelley!
DeleteThank you, my topstitching is far from perfect but I would love to sew someone up!
(I used to flat with a Vet and helped him out a few times, I really enjoyed it)
Is that a bit scary psycho?
xx N
Looks fabulous and great to see some pics of you modeling it :) I love that sort of loose-but-nicely-shaped kind of garment and your top-stitching is very inspiring.
ReplyDeleteThank you Jane. I really really didn't want to model it but I figured I can't wax lyrical and not show the fit.
DeleteI really like this smart hippy look, I can imagine several for summer.
Thank you again.
xx N
I always love seeing your sewing up close and personal. You are, as always, my sewing hero.
ReplyDeleteThank you Brittney, that is such a lovely thing to say.
ReplyDeletexx N
This is very pretty in denim. (I love your garment labels, btw.)
ReplyDeleteThank you Joy.
ReplyDeleteI love my labels and I have had three garments returned by someone ringing us on the phone number. Thus they have well and truly paid for themselves.
xx N