In threes it seems.
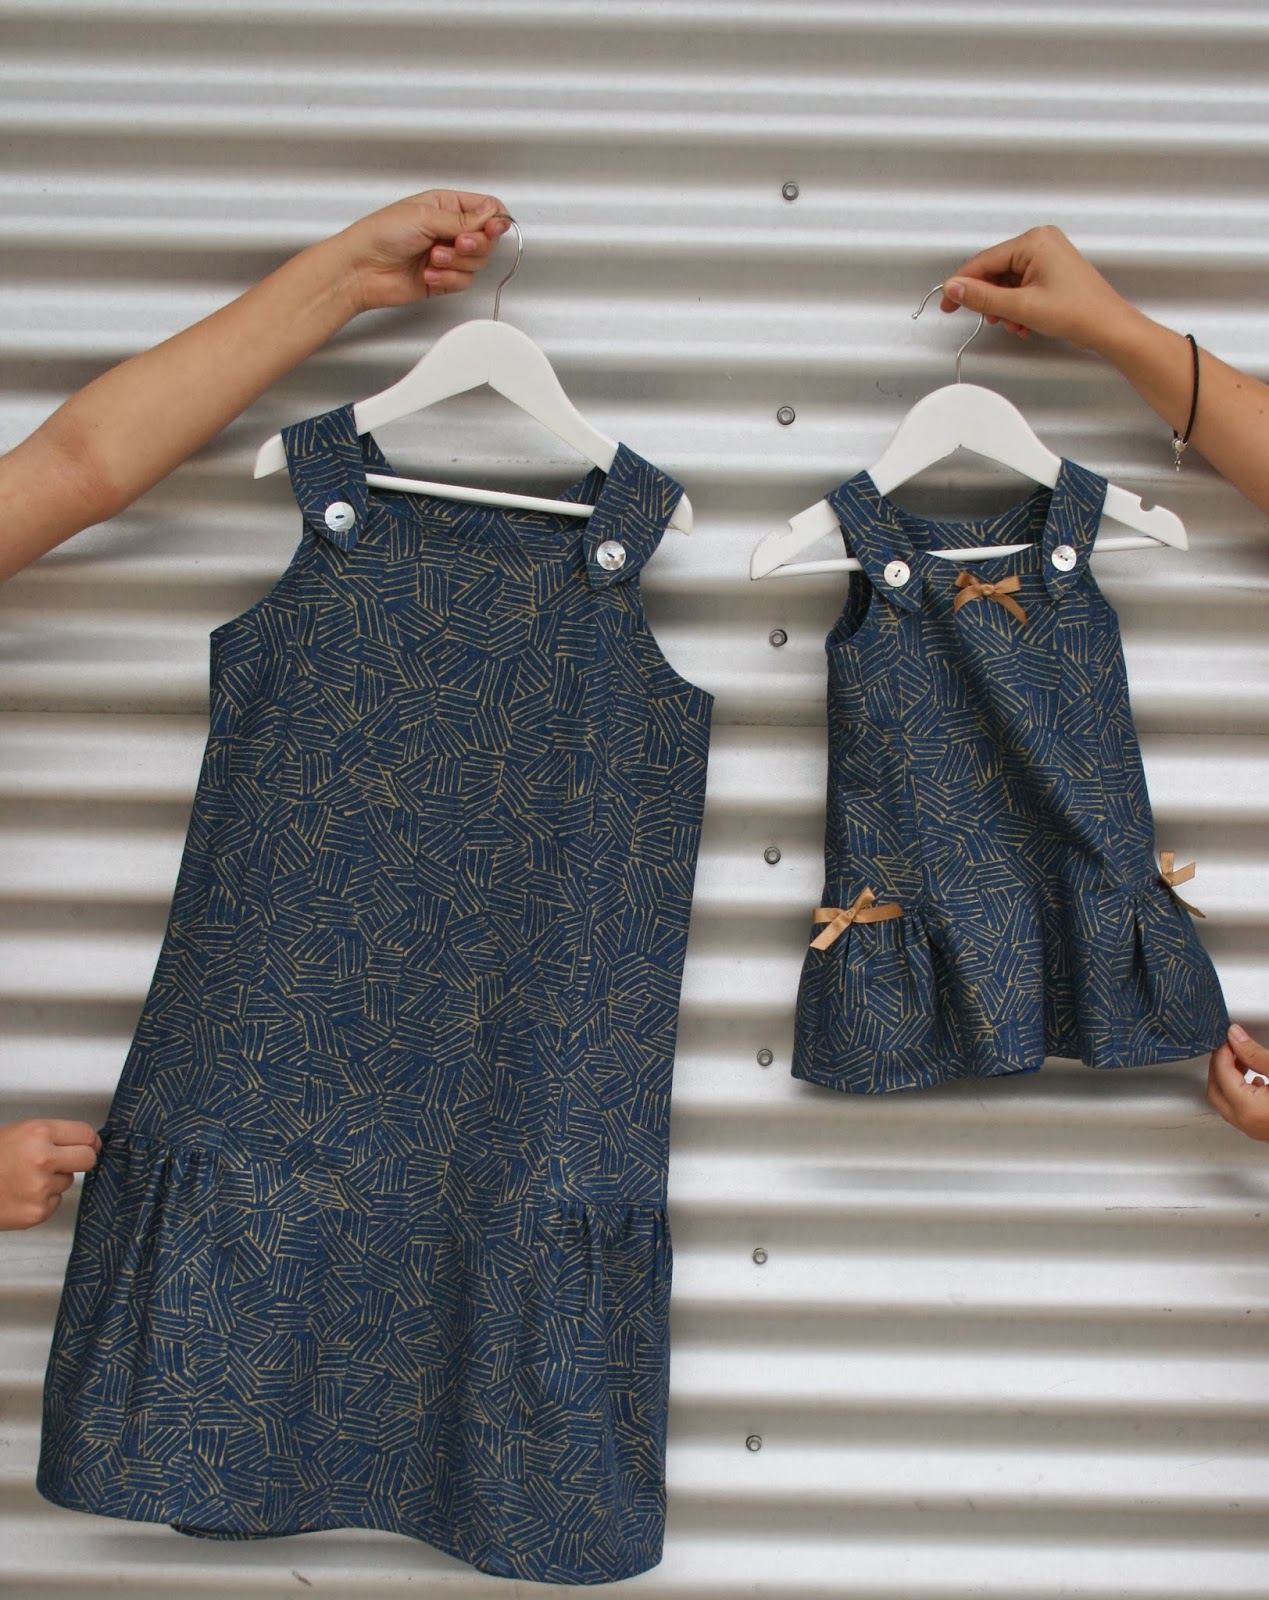
It all started when I made my niece Caitlin a Seashore dress for Christmas.
I had some pieces left so I decided to make my great-niece Amaya one as well.
But it didn't fit.
Her mummy requested another one so nicely I couldn't say no.
And why would I?
Who doesn't love to sew a baby dress?

After consulting my brains trust I decided to go with a size 3T.
Better too big then too small.
As I have made this dress four times now and twice very recently I have it down pat so I thought I would share some short cuts.
Please note, I am a big fan of following instructions. I always pull them out and check as I sew. I may do things a little differently here and there but if in doubt always check the directions.
So, lets get sewing....

An egg cup makes the perfect template for the round pieces.

of your dress.
Just like the posh fashion houses!

Dont worry about the wee gap at the top, that will disappear into the seam allowance.

- Sew the facings together at the side seams
- Sew the side panels to the centre back
- Sew the pocket linings to the front ruffle.

- Press the facings side seams open.
- Press the seam of the back piece
- Trim the pocket lining/front ruffle seam and clip the curve.


- Neaten the bottom edge of the facing
- Neaten the back piece/side panel seams and press towards the side panel.

- Topstitch the pocket lining/front ruffle
- Topstitch the side panel/centre back


Knot the threads once you are happy with the fit. Then you can ease out your gathers with out the fear of it coming undone.


- Sew the front ruffles to the side pieces
- Sew the back ruffle to the back piece.


Topstitch.


Straighten up and keep topstitching.
Repeat for the other side seam.

I like to stitch a narrow turning guide.

Press, pin and sew.
Then press again.

Match notches and side seams.
Transfer the centre notch stitching guide.
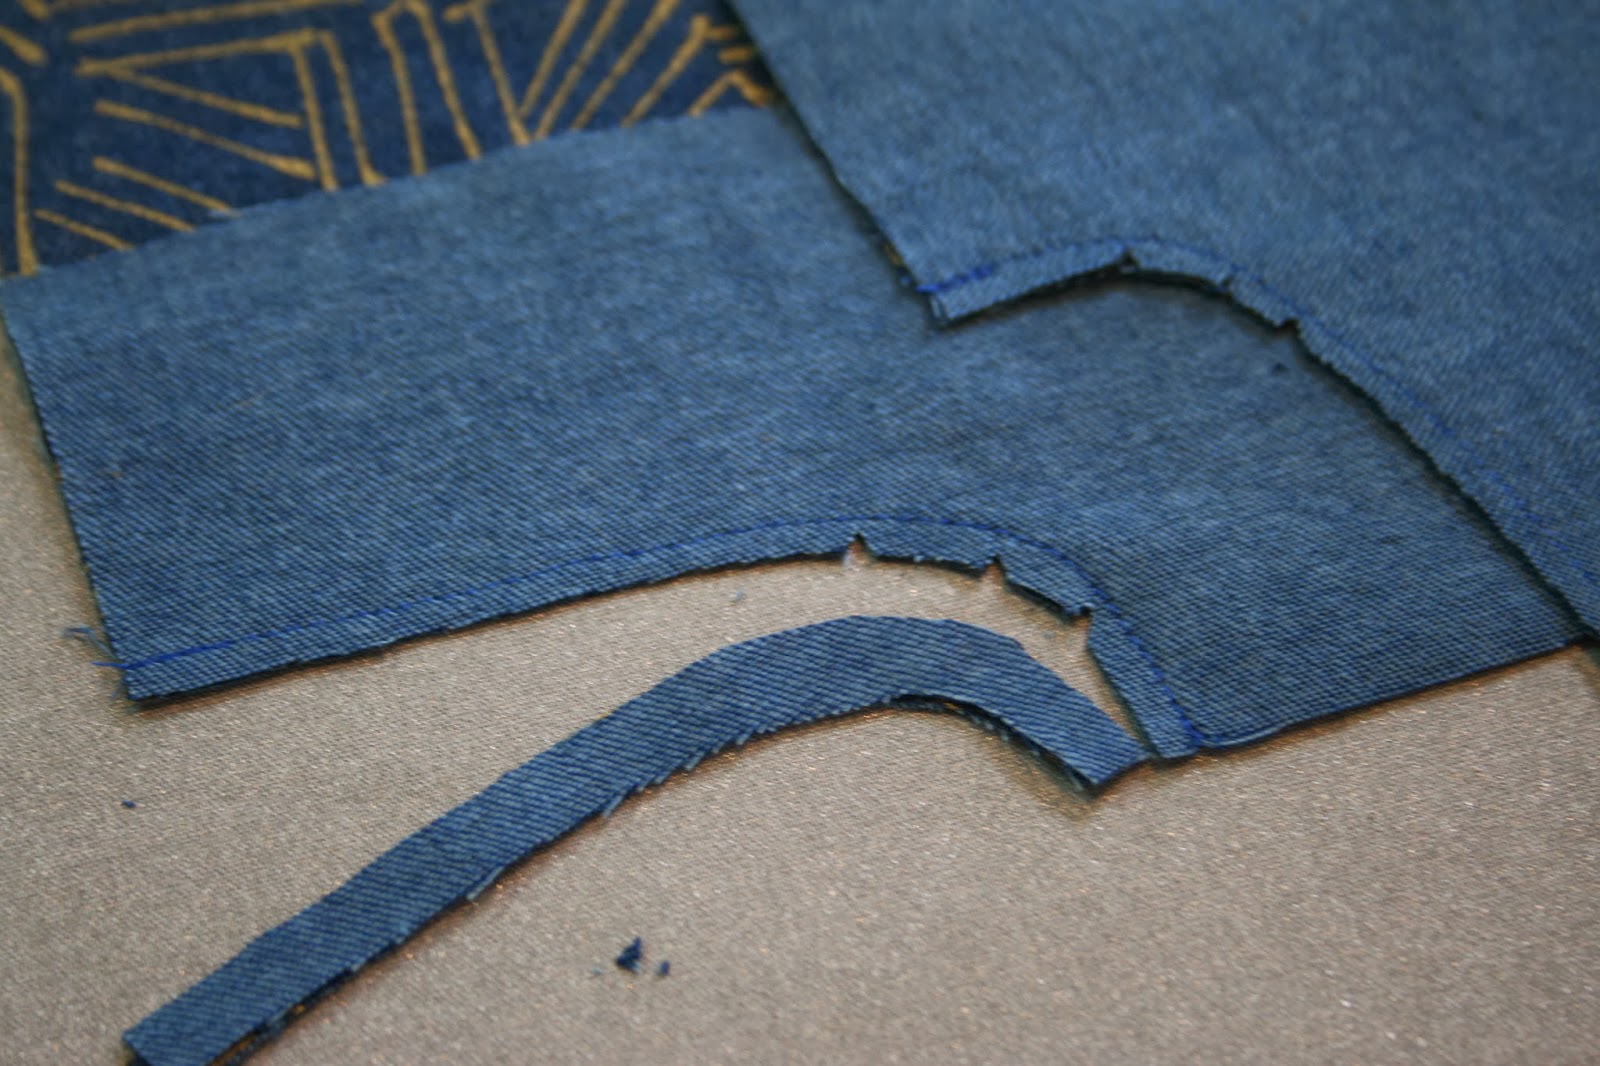
I like to mark all the seams I will be sewing over with chalk and reverse a few times when I reach the mark. This will make these seams sturdier when they are trimmed at a later point.

Take your time and sew accurately to achieve a nice curve.
Press and trim back the seam allowance.


I use a piece of dowel and a knitting needle (very carefully)

If this is a struggle, dampen the fabric a little.
Press well.


For some tips see here
Press well and you are done Baby!


Chose a different fabric.
Happy Seashore sewing.
xx N
Your sewing is so beautiful- even the inside seams are beautiful! And the gold butterflies are perfect. Did I miss what they are made from?
ReplyDeleteThank you Elizabeth. That is so sweet of you.
DeleteI show the stencils here http://fiveandcounting-motherof5.blogspot.com.au/2011/02/swimmers-and-all-things-glitzy.html but I shall go back and edit my post. Thanks for pointing that out.
I love the Library dress you made your little girl, lush colour.
xx N
I have this pattern, but haven't sewn on up yet. I will keep this in mind for future reference ~ thanks for sharing :)
ReplyDeleteThank you Rachel, its a sweet dress and a pretty quick sew for the result.
Deletexx N
Yep, it's on my 'to sew" list as well. I relish the reading of a new pattern and following the instructions but I do appreciate that Five and Counting is always there if needed! great tute.
ReplyDeleteLove those gold butterflies too!
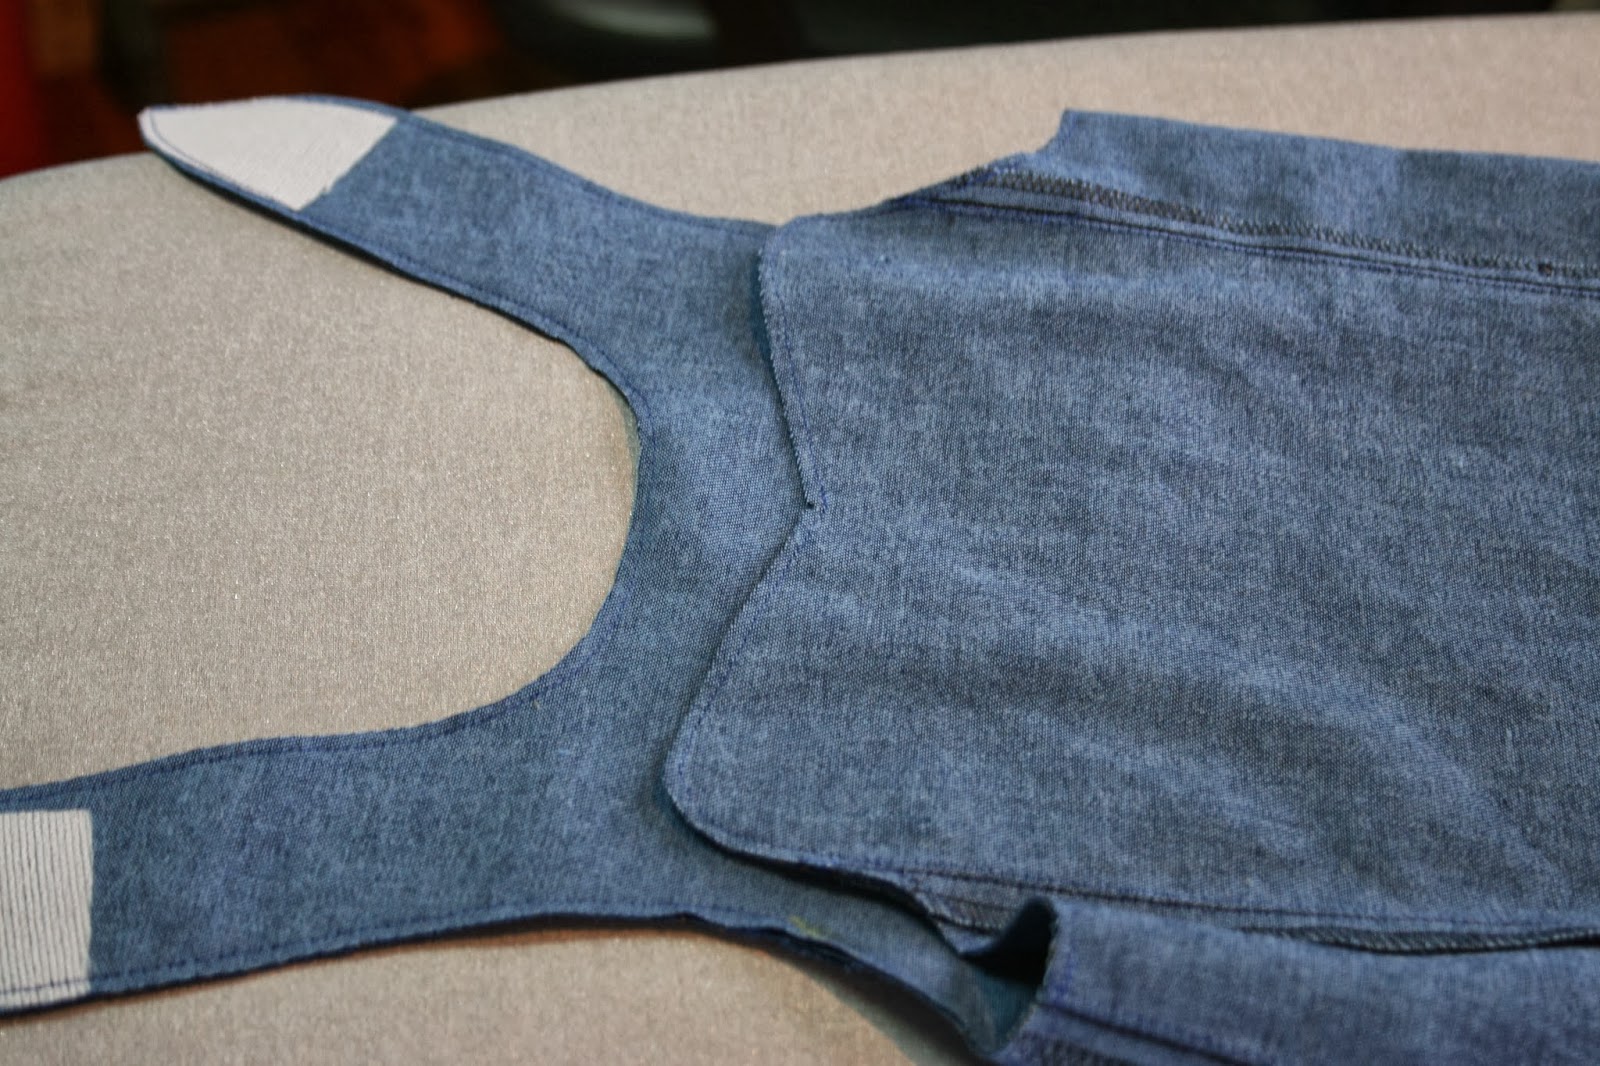
Thank you Shelley. I do my facing construction a little differently to the pattern. The O+S method is a good method (I did it the first two times) but I just found mine sat better under the arm (for me), using this way.
DeleteI hope Amaya's mum accepts the butterflies in leu of bows. (My pink Oliver+S thimble has been swiped again and I refuse to hand sew without it)
xx N
It's beautiful, Nicole, and Tilly looks fab in it! Apologies in advance if I've misguided you into making one that's a bit on the big side... Now I need to try this pattern again!
ReplyDeleteNo, no, no apologies please!
DeleteI would rather watch a Wiggles DVD then sew another Seashore dress in this fabric!
Bigger in much better!
xx N
Bigger IS much better.
DeleteThank you Catherine.
xx N
It looks so sweet on Tilly - I should make this one again (in less demanding fabric though!)
ReplyDeleteYours was the dress that set the standard!
ReplyDeletexx N
"Um no sweetie, choose a different fabric" hahaha! Made my night! I can see why she would want the same fabric, it's adorable, but I also know exactly why you want another fabric! I am making sister sets of a bunch of outfits soon and it always drives me crazy by the end.
ReplyDeleteIts great fabric but I really really don't want to sew anything else from it for a while.
DeleteI can't wait to see yours!
xx N
I always love your tips n tricks posts...they are chock full of good information! The dress is lovely.
ReplyDeleteThank you Cindy.
DeleteI always recommend following instructions but after you have made thejm a few times, you can find a few 'short cuts' with a pattern.
xx N
The dresses are beautiful. And I do enjoy - and find useful - "watching" another person sew a garment (something I don't get to do in real life). I'm very much not an instruction follower, hehe.
ReplyDelete"Choose a different fabric". haha - Isn't that why we have fabric stashes?
Thank you Joy.
ReplyDeleteAbsolutely, it was lovely fabric to sew but I need a break from it!
xx N