On to the pants!
Pockets
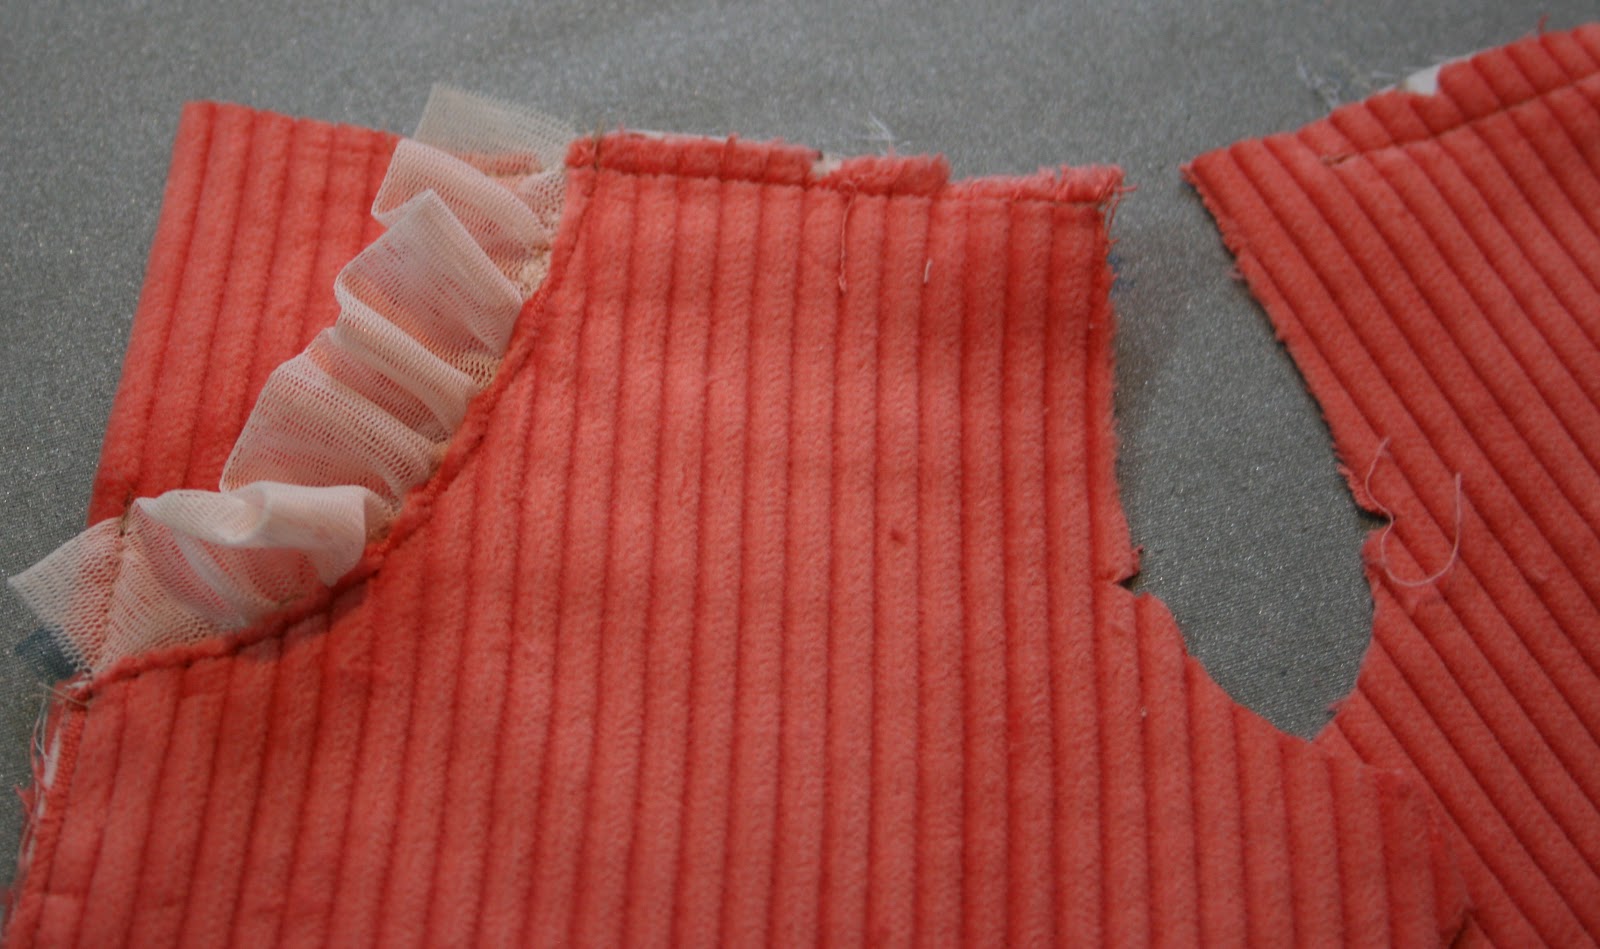
Following the instructions,prepare the front pocket ruffle.
Pin the ruffle to the pocket edge.
Adjust the gathers so they are even.
Sew in place.
As I was using such a flimsy fabric for the ruffle I sewed a second row of stitching to hold it in place.
Pin the pocket facing to the pants front,right sides together.
Check the ruffle is not tucked in the seam.
Sew,press,trim and clip curves and press again.
Flip the pocket lining and press in to place.
Gently roll the seam into place making sure the ruffle is even and not tucked.
Press well.
Top-stitch the pocket edge. and press again.
Pin the pocket bag to the pocket lining taking care not to catch the pants front in the pins.
Sew and neaten,then press well from the wrong side and the right side.
Pin and baste the side and the top of the pocket.
This will aid in keeping the pocket in place whilst sewing the rest of the pants.
Leg Panels
Sew the side leg panels.
Press the seams down.
Topstitch the seam.
Pockets
Fold the top of the pocket down by 1/2' and press.
Then fold the pocket to the right side by 3/4'.
Stitch in place.
As I was sewing cord which is a fluffing nightmare,I over locked the edge.
I also sewed a turning guide line.
Turn,fold and press the pocket.
Stitch the pocket facing down.
I like to continue stitching the pocket edge down.
Pin the pocket in place.
Use the pattern piece as an overlay to check the pocket position.
Pin in place.
Stitch in position.
Back Ruffles
Prepare the back ruffles.
Match the end with the side notch and pin top and bottom.
Gather and adjust the ruffle to fit.
Pin in place and sew.
Sewing the Panels
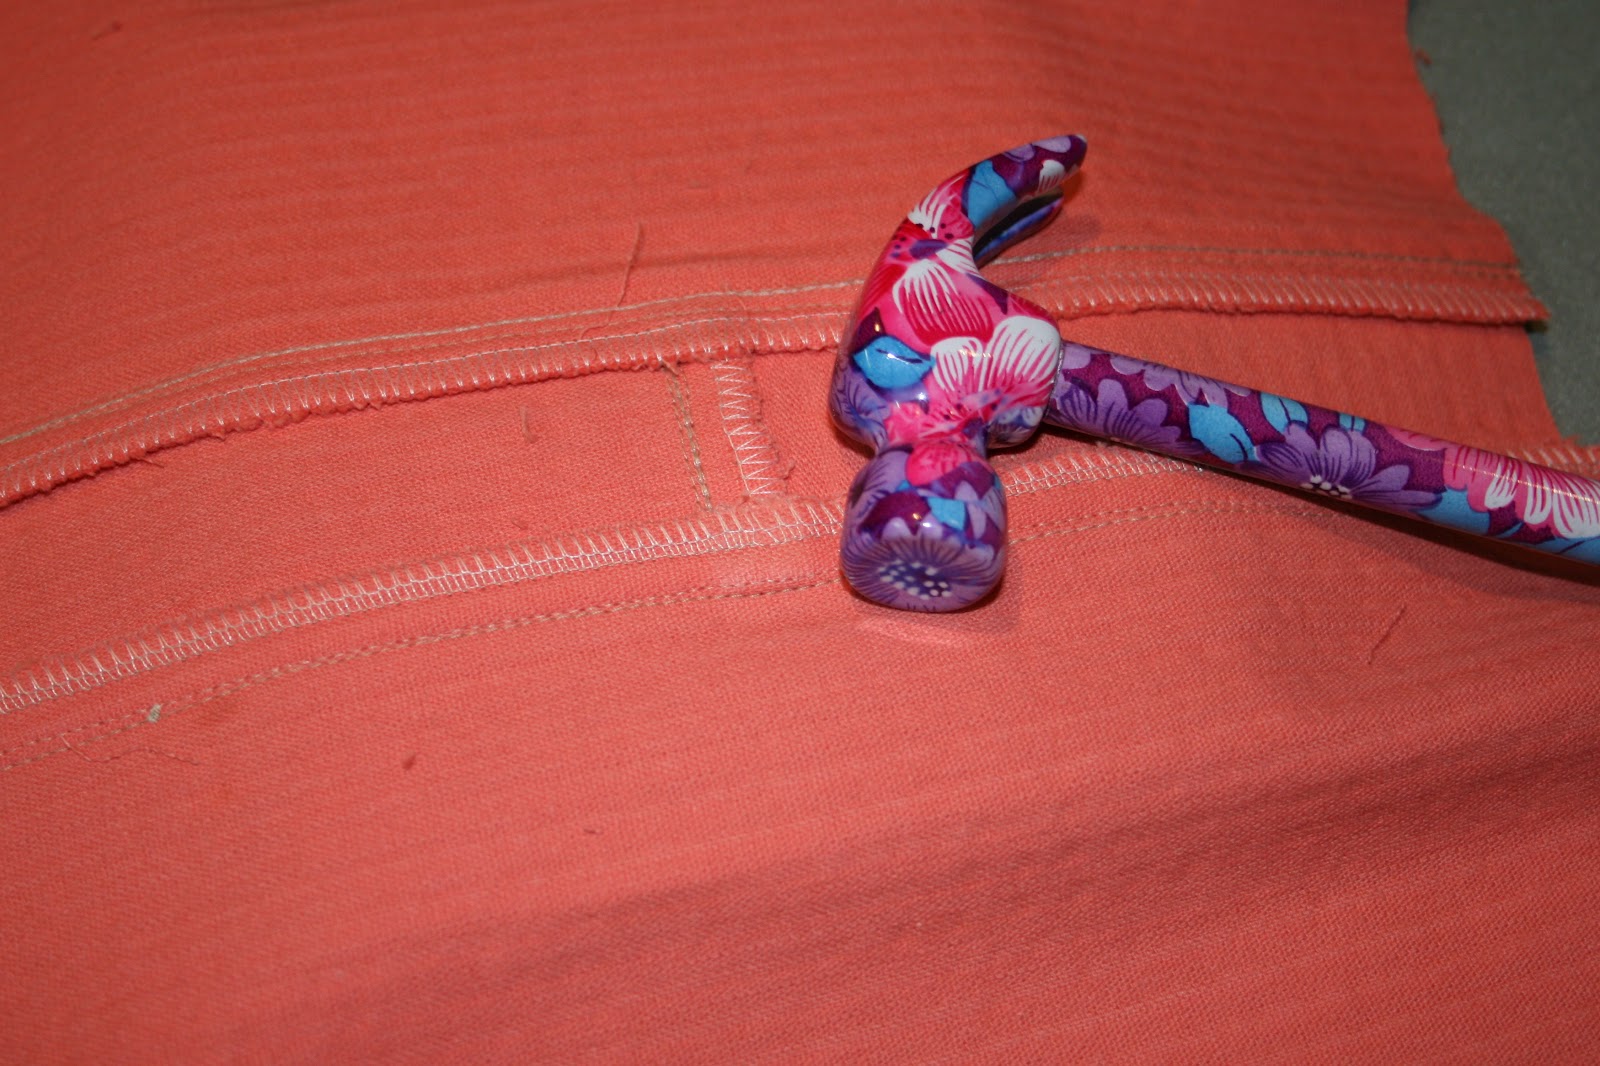
Pin the side panels to the back pants matching notches.
Sew,neaten and press the seam towards the panel.
This can create a bulky seam.
A few taps with a hammer will subdue it.
Topstitch the seam.
Next we sew the front to the back.
It can be helpful to pin the ruffle out of the way.
Pin,sew and neaten the seam.
Make sure the notches match.
Again,thick seams may need a little subduing.
Topstitch the seams.
Attaching the yoke
This next seam is curved so it will need some easing whilst sewing.
Pin the yoke to the pants top following the curve.
I found marking the back clearly(see previous post)really useful.
Thanks Justine!
Sew and neaten.
Check for tucks and fix them before moving on.
Press the yoke well,seams towards the yoke,stretching it gently to help create the curve.
Topstitch the seam.
Sewing the legs
Pin the inner legs together matching the notches.
It is far better to have a slightly uneven hem them not match the notches.
If the notches don't match the legs may be twisted and not sit nicely.
MATCH THE NOTCHES.
Trim any unevenness from the hem.
Detour
I chose to finish my seams together. This next section differs from the pattern.
Press the inner leg seams in opposite directions on each leg piece.
Place on leg in side the other,right sides together,matching notches with the crotch seams facing opposite directions so the the bulk is evenly distributed.
The staggered seam at the crotch.
Neaten the seam.
Press the seam well.
I quite like to topstitch this wee bit to help hold the seam in place.
And do the same at the centre back.
Topstitch the centre crotch seam,
This can be fiddly but you can do it!
Subdue any tough seams with a wee whack!
Back to the pattern and Hemming and Waistband
Sew a folding guide for hemming.
Do the same at the waistband.
Fold and press.
Fold the waistband as directed.
Pin in place leaving a gap to thread the elastic through.
Fold the hem.
It may be easier to sew from the inside.
Press well.
Stitch another line around the top.
Press again.
Measure up the elastic for the waist.
Trimming the end of the elastic can make it easier to thread through.
Pinning the end can save an accidental pull through!
Once the elastic is threaded through stitch the ends together.
Pin and stitch the opening.
And you are finished!
How cute are these?
Check out the weeny pockets!
Pattern chatter...
A great unisex pattern. The trousers fit true to the size chart(maybe a little longer in the leg). Matilda measures at a 18-24 month and that is what I made and they fit perfectly.
They are a slim fit,I seriously doubt they would go over a cloth nappy,I would suggest sizing up 2 or more sizes and shortening/rolling the legs up if that is an issue.
The top is a cropped design and quite roomy.
I made the 12-18mnth and it is perfect through the body. I lengthened to a size 4 but would probably add another inch next time,as well as a few inches to the sleeve.
It has a lovely wide neck and with all the buttons undone easily goes over her big noggin.
I sewed the pants in soft wide wale cord and it was lovely. Some seams were a bit bulky but 'subdued' nicely with a tap from my hammer.
I did find it very slippery to sew(possibly because I reversed the pile)I had to sew and then overlock or the seam moved.
The stretch tulle was a bit fiddly but well worth the effort.
Thanks for reading,
x N


I have been following your posts and you do an amazing job.
ReplyDeleteIt always catches my attention your brand tags.
Where do you get them?
Thank you.
Thank you so much Kathya.
ReplyDeleteI sent you an email with the details for the labels.
x N
You and your hammer...love it! The pants are adorable as is the coordinating top.
ReplyDeleteThank you Cindy.
DeleteAt least no one seems to pinch my floral one!
xx N
Such a sweet outfit - can't wait to see it on her!
ReplyDeleteAnd I shall definitely be marking my yoke for front and back next pair around.... :-)
Thank you Justine,especially for the yoke tip.
ReplyDeleteI am so pleased with them and found some dark brown cotton rip stop to make Liddy a pair to match the lovely fabric you sent to me.
xx N
Such a great color! The tulle is a nice touch. She will look divine in the outfit!
ReplyDeleteThank you Brittney.
ReplyDeleteI can't wait to show you!
x N
These are excellent *pants* indeed!!
ReplyDeleteWell done!
He he he he,Tildy laughs every time I call them *pants*,'They are not knickers'!
ReplyDeleteThank you Susanne.
These are so cute! You say trousers, I say pants ... let's call the whole thing off!
ReplyDeleteI have become quite 'American' as I sew so many of the o+s patterns but my children correct me!
ReplyDeleteThank you Inder.
xx N
Thank you!!! I've been toying with the idea of doing an Oliver + S pattern (a little intimidated). I read your review on their website and following your link. Beautiful tutorial! You've boosted my confidence….I"m going to do it!!
ReplyDelete(and I think I'll tell my daughter they are "trousers" to make them feel exotic! ;) ….) …………..c.
Thank you Carol, you have made my day.
ReplyDeletexx N
Using a hammer to subdue those thick seams is brilliant! I've been making Oliver + S clothing for my great niece and nephew for a few years now. I could've used the hammer trick a few times! Thanks for all of the tips/tutorials.
ReplyDeleteThank you!
ReplyDeleteI love love LOVE getting comments on my old posts.
Lucky nieces and nephews to receive special sewing.
xx N