Tilda is finally growing out of her clothes so it was time to make some new things.
A perfect opportunity to try something new.
After checking out the forums and the flickr group,which I like to do before sewing something,there seemed to be some discussion that the top was generous with width and also had a cropped style.
I quite like a boxy cropped blouse but given that Matilda has no shoulders to speak of and always wears a singlet,I decided to size back and add length.
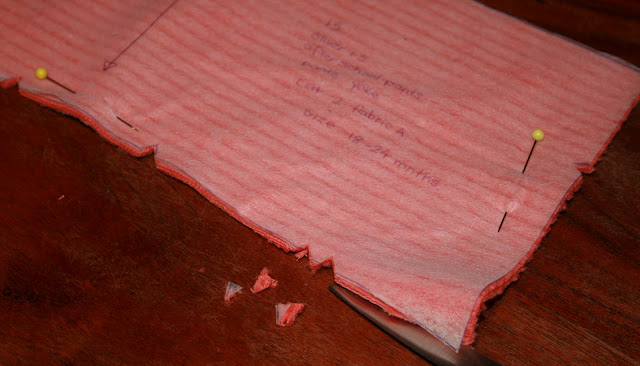
I went with the size 12-18 months and lengthened to a size 4. I figured I can always shorten later!
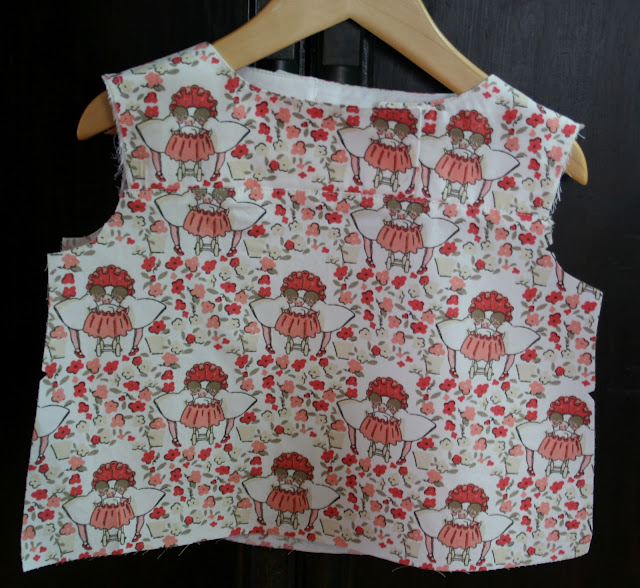
I have cut it from this divine Cloud 9 fabric.
Isn't it dreamy?
I picked up some gorgeous deep coral corduroy for the pants and I have gone against my teaching and cut it with the smooth finish going up the leg.
It was a suggestion by the lovely Liesl herself,in the forum,to achieve a truly lush look.
She was right and I feel so naughty-going against the grain literally as well figuratively.
Another comment I read was that it could be confusing differentiating the front from the back of the yoke piece during construction.
So I cut an extra notch at the back and marked it on the pattern sheet.
Finally,I decided on some soft coral mesh tulle for the ruffles.
I am still not 100% on this.....it may be left off.
Ooooh,which shall I sew first?
Maybe the top!
Matching notches,sew the yoke shoulders together.
Use the pattern diagrams,they are excellent,in fact all of this pattern is very very well written.
You probably wont need this tute!
Press the seams open.
Place the yoke pieces RIGHT sides together.
If the notches match-it is correct!
As directed,apply interfacing to the inside yoke.
Pin the yokes together as above.
Sew.
Press well.
Trim the seams and corners.
Turn the yokes through and gently push out the corners.
Roll the seams under your fingers,dampen them if necessary,and finger press the edges.
Press the yokes well and topstitch the edge(if you fancy)
I quite like to reverse over the shoulder seam a few time to give it some strength. This seam will take pressure as your child dresses and the seam locking would have been cut off when the neck was trimmed back.
Press well and then baste along the raw edges.
Press again.
Following the pattern instructions,place the long flap over the shorter side,matching notches.
Repeat with the back yokes.
I chose not to do my button holes yet,you may,of course,do so!
Baste together.
Pin the top front to the front yokes.
Sew together and neaten the edge. Press well.
Press the seam down towards the top front piece.
Topstitch the seam.
Rinse and repeat with the back yoke and back top piece.
Moving on to the sleeves,fold the hem by 1/2' and press.
Fold it again by 1 1/4' and again press well,pop the sleeves to one side to let cool and set.
Gather the top of the sleeves between the notches.
Matching the notches first,pin the sleeve to the shoulder seam of the top.
Pull up the gathering threads and ease the sleeve in place.
Sew from the top side to help avoid tucks.
Press the seam.
Neaten the seam and press again.
Take the time to press the shoulder seams well.
The end of the ironing board is very useful. The seam will be pressed towards the sleeve.
Nearly there!
Pin the side seams matching notches and the underarm seam,unfold the seam hem as you pin.
Sew and neaten.
Refold the hem and press.
Press the side seams to the back.
Sew a hem folding line along the bottom.
Press up the hem.
Fold and press again. Pin in place.
Ready to hem.
Stitch the the hems on the inside,much easier in little sizes.
Press the side seams.
Mark the buttonholes.
For some button hole tips see here!
Here we go,one cute little top.
Very cute with last years 2+2 skirt.
Next up,the pants!
x N


Very sweet!
ReplyDeleteThank you!
DeleteThe fabric was a very impulsive buy.
I saw an Icecream dress on flickr made up in it,Goggled it,found it,purchased it and all while I was in the car waiting for Hugo to finish at the dentist!
Love my laptop car charger!
xx N
I love it with the skirt but can't wait to see the pants!! I have made baby C an outfit but must make Sarah some too. The fabric is perfect with this pattern too.
ReplyDeleteThank Sharon,I hope to get started today,but with a social tonight I may be busy doing hair!
DeleteI saw Caspian's,so very sweet!
x N
Adorable! That print is so sweet.
ReplyDeleteIsn't it Cindy?
DeleteI paid a silly price for it and then Justine found it at fabric.com! She is so sweet,she purchased the aqua print form the same collection for me for my birthday.
Thank you!
x N
I love watching you sew, Nicole - it's like poetry!
ReplyDeleteCatherine,that is the loveliest thing to say! Thank you!
Deletexx N
So lovely - can't wait to see the pants
ReplyDeleteAnd I agree with Catherine - poetry in motion :-)
Thank you Justine and thanks for the back yoke tip!
Deletexx N
So cute! I can't wait to see those pants.
ReplyDeleteThank you Karen,I can't wait to get started.
Deletexx N
Lovely little top. I must get around to making up this pattern too
ReplyDeleteI was determined to use it before buying the new ones when they come out.
ReplyDeleteThank you
xx N
Perfection! How did you know I drafted this pattern for the twins this week? ;)
ReplyDeleteThank you Brittney.
ReplyDeleteOh,its a twin mum telepathic thing doncha know?
xx N