I know it took so long for me to do this one-but life became busy.
(and I wouldn't have it any other way)!
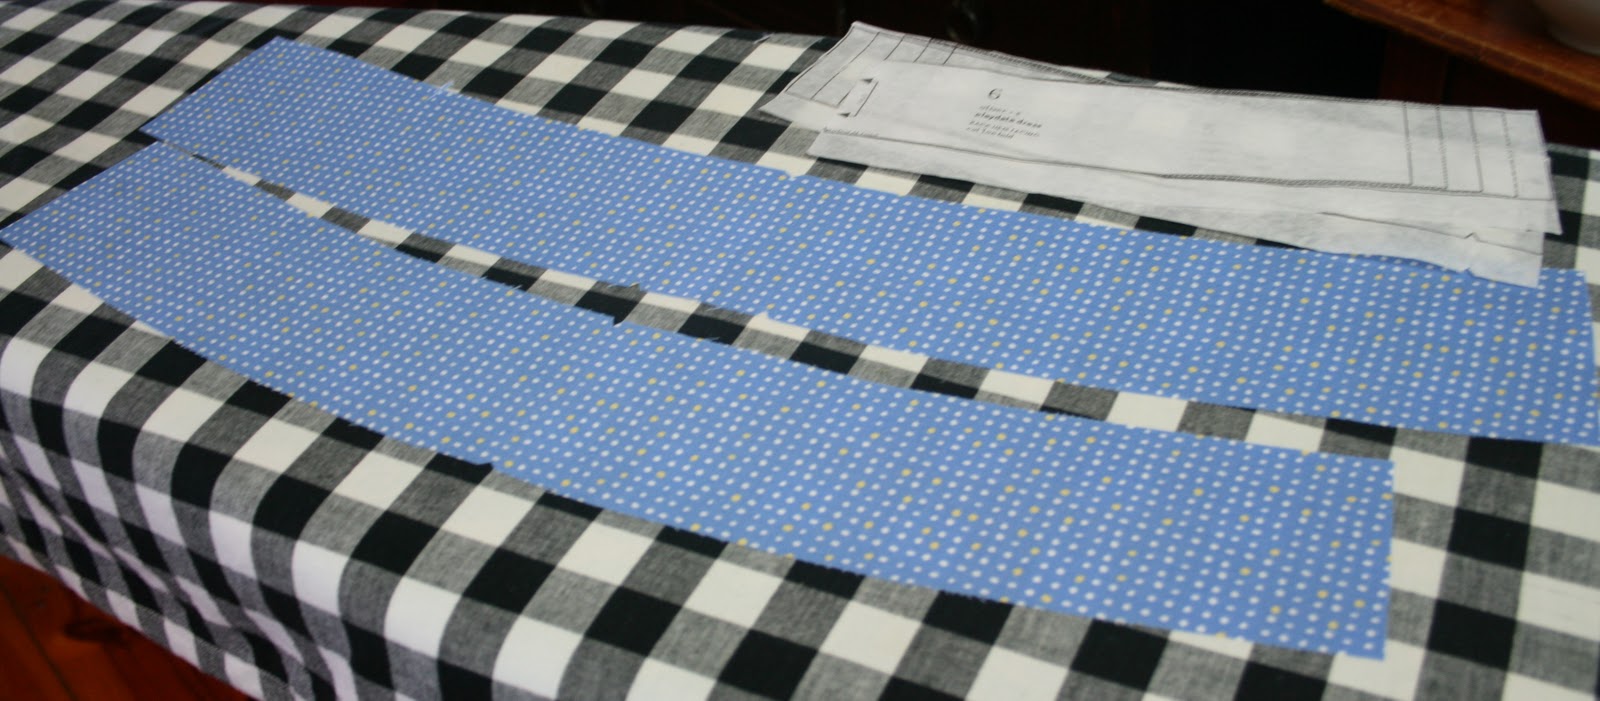
On with the hem facings!

Pin the ends of the facings and sew.
Make sure they have the curves running the same way!

Press the seam open.

Press the top edge of the facing with a narrow hem.
This is the piece you will stitch in place last!

Pin the hem facing to the hem of the dress.
I like to pin in equal intervals and then at gradually smaller increments. There is a small amount of ease but don't stretch the facing to fit.


Once stitched,press the seam allowance towards the hem facing.


Stitch along the edge of the facing making sure to catch the seam allowance.

Press the facing well.

Turn the facing up to the dress and pin in place.
Again,consider pinning the side seams and then centre front and so on....


Sew the hem.
You may choose to blind hem. I decided to use the hemming treatment that is used in the Family Reunion Dress Pattern.
Take your time and ease the facing gently. Stop and lift the presser foot if tucks are created.


For best results don't look at the needle,watch the edge of the presser foot.

I liken this stitching to driving on a dirt road. If you get a bit wonky slowly guide the foot edge back to the stitch line don't ''grab the wheel'' and over correct!
I promise,if it is a little wobbly no one will notice!

Ta-dah!

Remove the centre front basting.

After many discussions,Lidia and I decided on the special wooden buttons from Claire with lemon embroidery thread.

Are they not beautiful?

I love the traditional feel of this yoke.

Just thought I would mention.......if the worst happens and this dress is too snug over your little girls head,this seam can easily be unpicked almost down to the flat piping.

The beautiful back!

The fabulous front!
Now Miss Lidia,are you ready for that Play Date?
fabrics are all by Liesl Gibson-The City Weekend Collection available here!
Seeing yours finished has inspired me to get stuck into mine again Nicole!
ReplyDeleteAnother night or two and I should have it done, depending on the time available...
This looks lovely - you always produce such professional looking garments.
It's beautiful, Nicole! Those buttons are divine.
ReplyDeleteLove every last detail! Great tip on opening up the seam on the back of the yoke if it doesn't fit. I've got two girls with big heads!
ReplyDeleteBeautiful!
ReplyDeleteKaren,you have just moved! I am amazed that you even have your machine set up!
ReplyDeleteThank you,I try and finish things well but as I was saying to Sarvi,I seem to have lost my 'creative' side in the process.
Thank you Cindy,I love these buttons so much!
The very first dress I made Matilda did not go over her head Sarah. I was determined to get it on her and the seam popped a bit as I was tugging it. That gave me the idea. Poor baby!
Thank you!
Thank you Susanne!
x N
Oh, Nicole - you've finally pushed me to make this!
ReplyDeleteI don't think that you have lost any of your creativity in your sewing! You have an amazing flair!
Hurray Justine,I still want to make an all denim version! I think that would look fab!
ReplyDeleteThank you,I do like my sewing but it sure aint Sarvi!
x N
Here I am swooning again at how neat your sewing is! These posts on the Playdate are wonderful, especially since I had to sew it differently when I made it a year ago, because I wanted to line the whole dress.
ReplyDeleteI'll second Justine on your creativity and flair :-) I love how you make little changes to the patterns that dramatically change the look.
Angela
Thank you Angela,that is seriously kind of you!
ReplyDeleteI wonder if we lined(the dresses) the same way?
I have nearly finished the blog post....poorly children!
x N